Chocolate- Dutch VS Natural Cocoa for Baking

We all love chocolate and we each have our favorites when it comes to flavor.
I am a total chocaholic. Personally I would eat chocolate everyday if I could. lol

We all see recipes everywhere for cakes. And not everybody in the world is a chef and knows the difference between chocolates. Most of the time a regular person will see a recipe and go to the supermarket to buy the first cocoa they can find. Some people don’t even notice or think much about a recipe that is asking for dutch process or natural cocoa. All they see is unsweetened cocoa and that’s the one they will invariably go for.

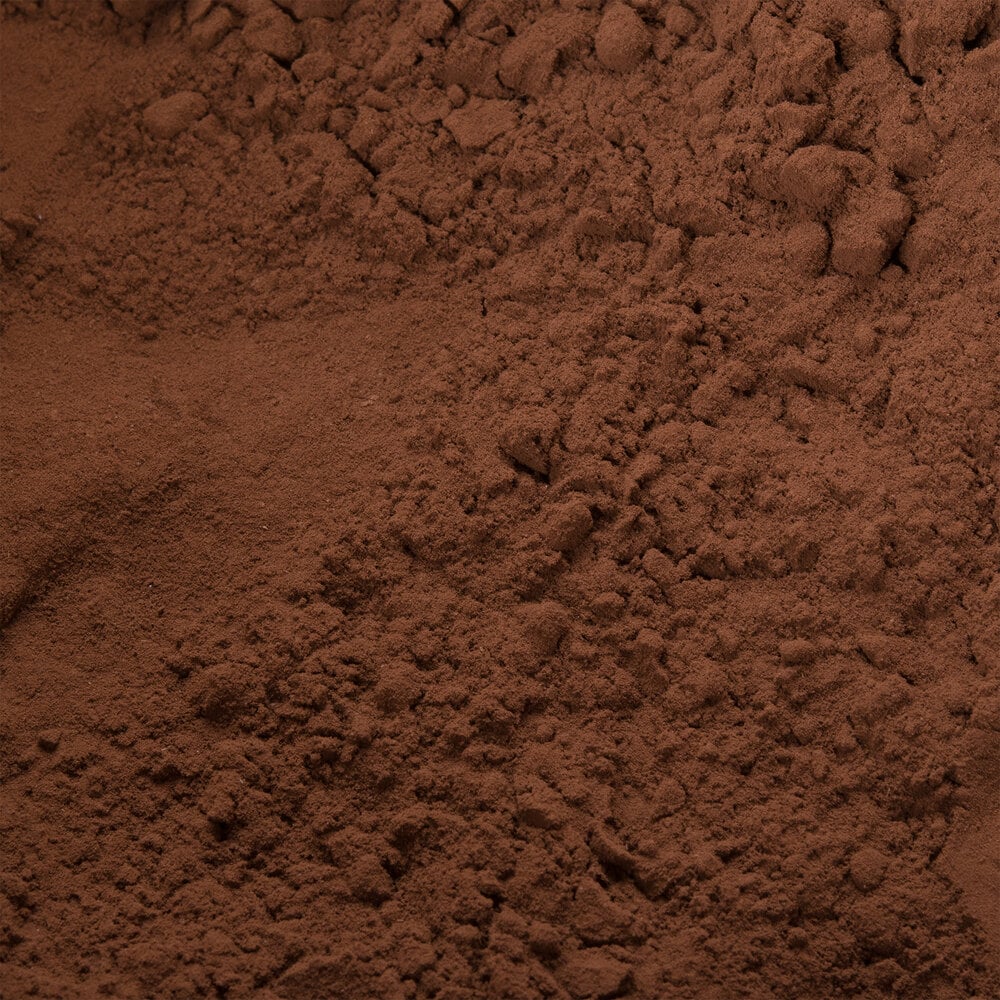
I myself didn’t know much about the differences in chocolate until I started baking. There’s a world of information out there all about just chocolate. I’m no expert on just chocolate but I do know my basics on it and I will share one important fact.

When we see a recipe for a chocolate cake, the most important part it is the type of cocoa you should use in it. You will find mostly 2 types of cocoa powder. One is called “Natural” and the other one will be “Dutch Processed”. Even though these are the most common ones, there are other types or combos out there that you guys can explore. In the meantime I will explain the difference between these common two.


Chocolate Buttercream Recipw

Natural cocoa is solid, unsweetened chocolate that’s had most of its fat removed before being ground into powder. This cocoa powder is typically sold unsweetened, and although it may taste a bit bitter or harsh on its own, it can work well in baked goods that are meant specifically for this type of chocolate. This type of cocoa is consider to give a more drier outcome.

Dutch-process cocoa is natural cocoa that’s been treated with an alkalizing agent to lower its acidity. This allows more of its pure chocolate flavor to shine through. The alkali helps neutralize the natural acidity of the powder. The process gives the cocoa powder a more mellow, smooth and less bitter flavor. This type of cocoa tends to give a more fudgier, moist taste.

There’s a lot of science behind which one you can use when it comes to baking a cake. Natural Cocoa and Dutch cocoa are not interchangeable in all recipes. I will simplify by saying this: If a cake recipe only calls for baking soda, it likely uses acidic natural cocoa. If it only uses baking powder, it’ll probably ask for Dutch process cocoa instead. If a recipe calls for both, baking powder and baking soda, you’ll need to follow the recipe to get the proper balance of acid and alkaline. Recipes that use baking powder will likely rise anyways but not as well. So basically it’s best to stick to the cocoa that a recipe calls for. I personally tend to use dutch cocoa if the recipe doesn’t say which kind of chocolate to use.

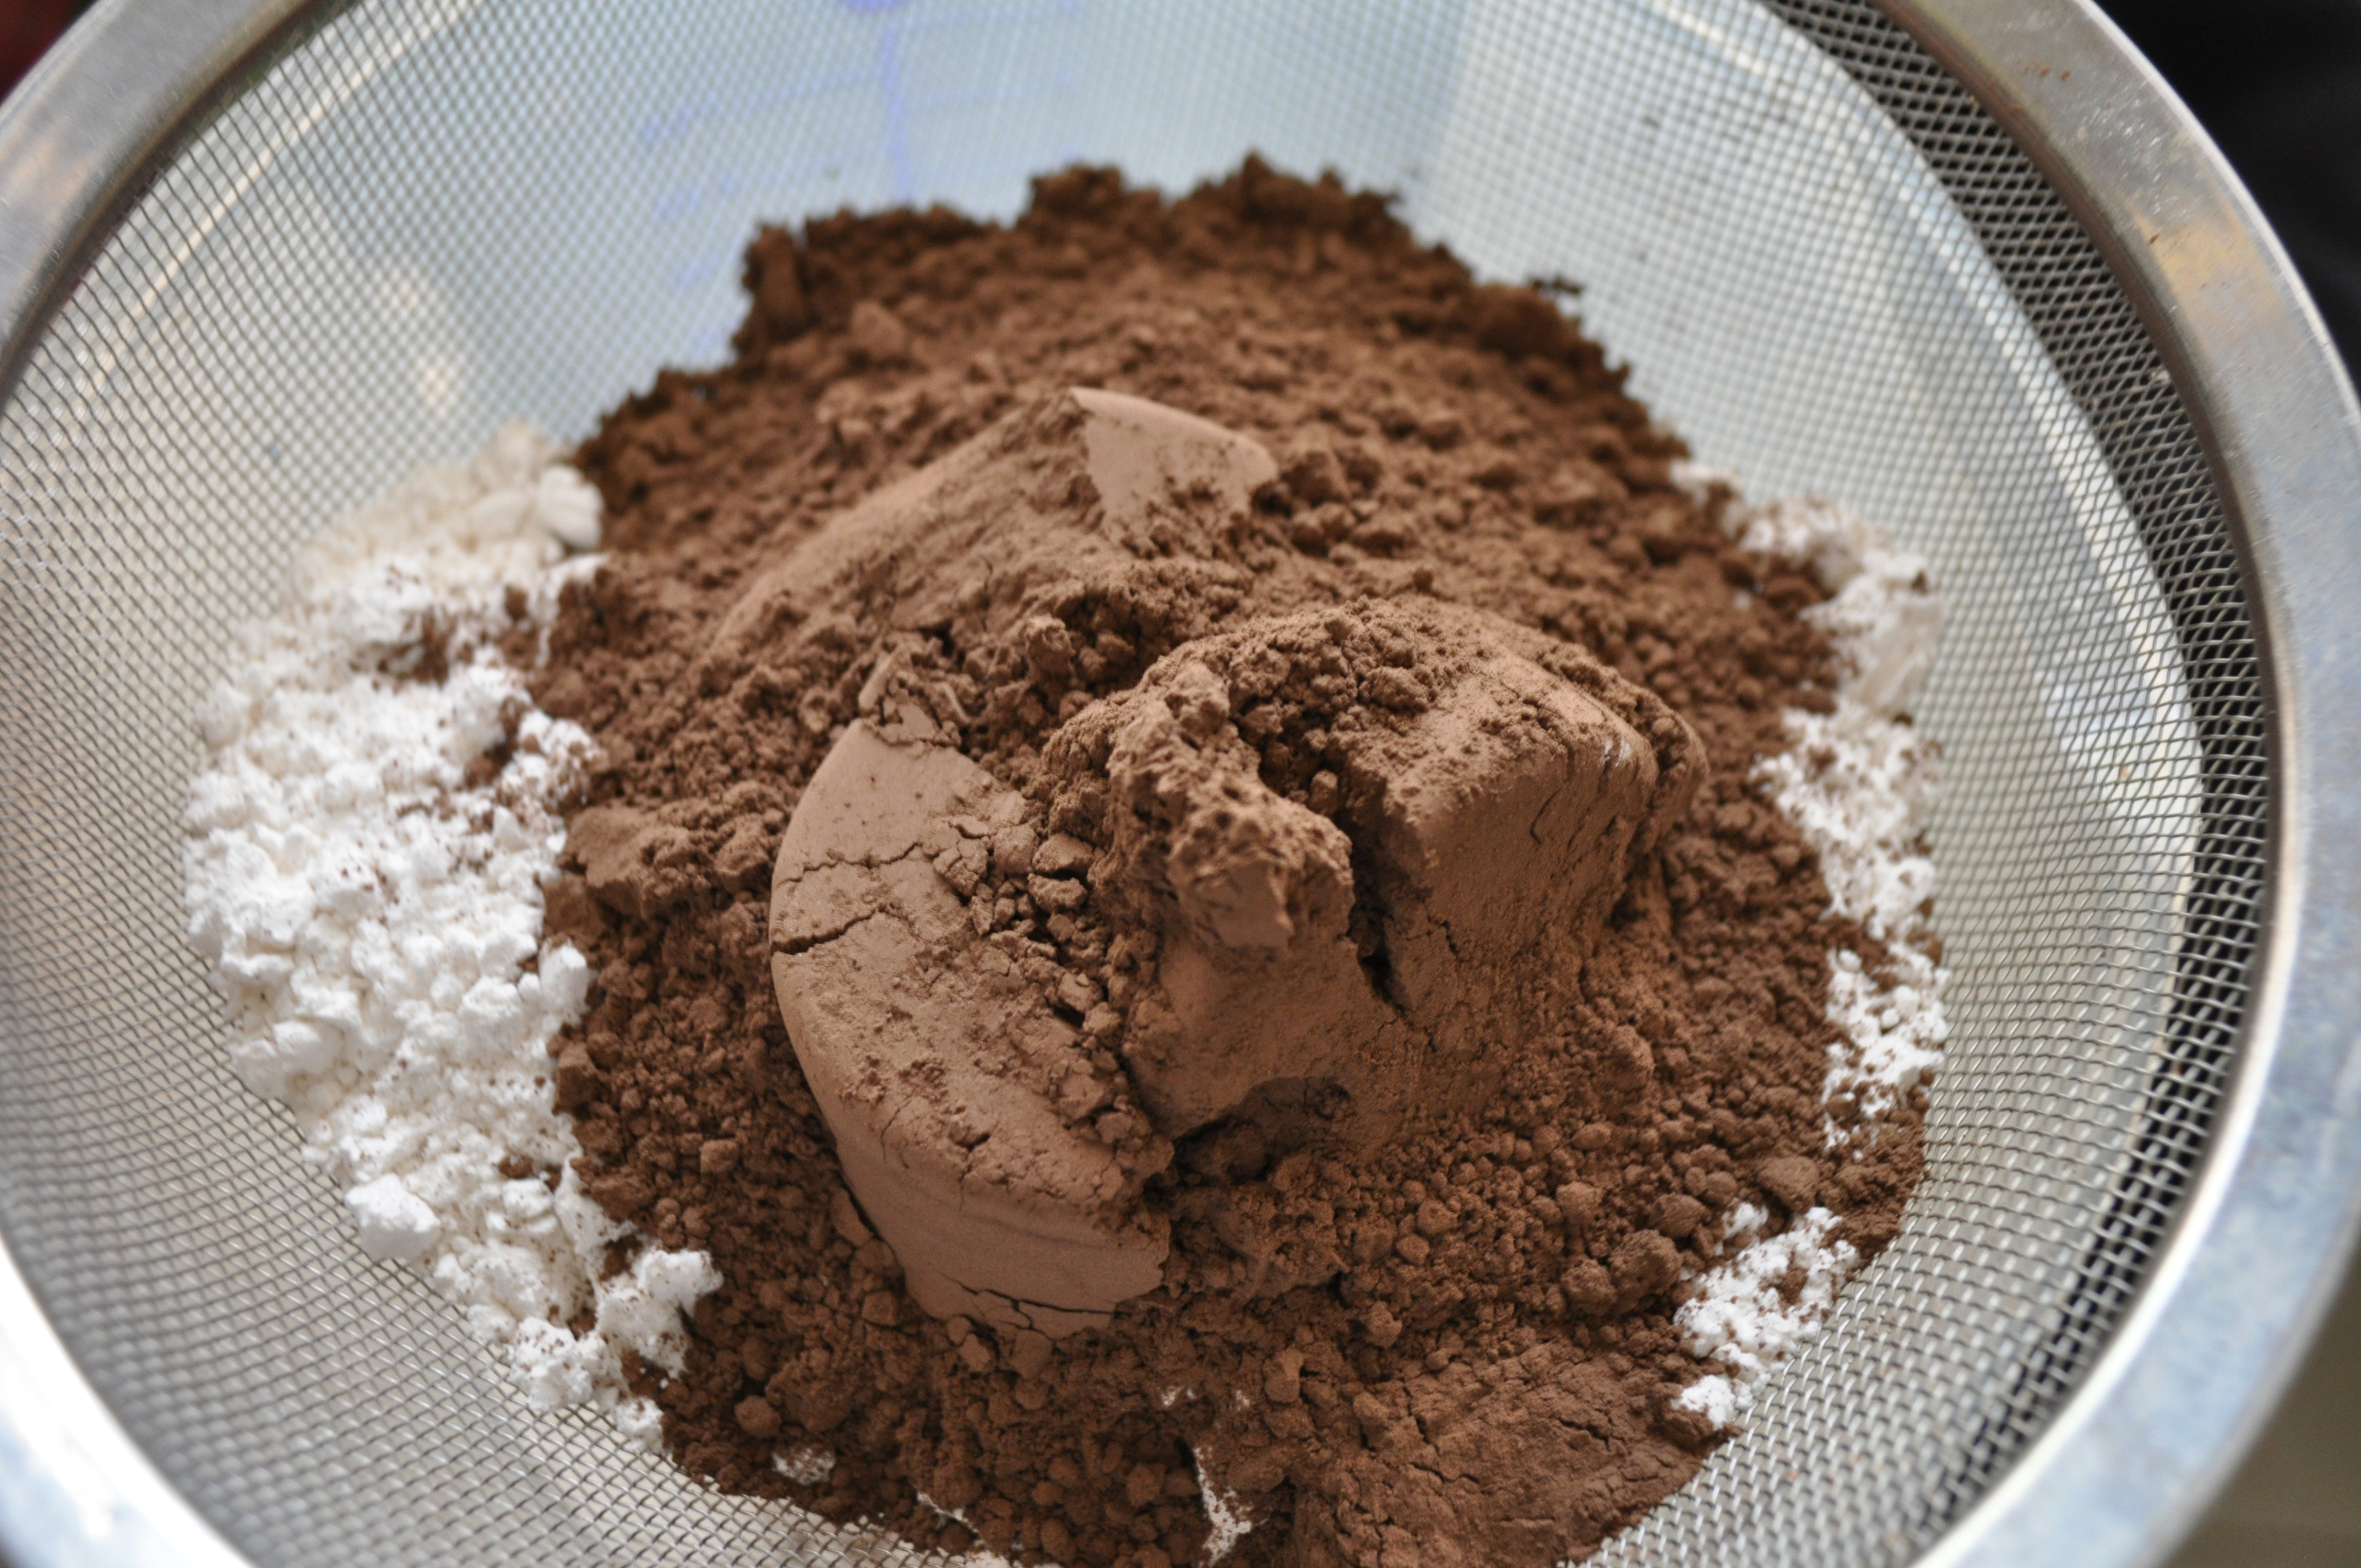
Using the wrong cocoa in your recipe not only can make your cake go flat, but it can also make the flavor of your cake change drastically and you can end up with a cake with a strange or soapy taste. Keep in mind that some recipes have other acidic additions that come into play like buttermilk, fruits, sour cream, vinegars and other acids.

I would suggest that when you try a recipe for chocolate cake, make sure to see if there are any specifications for what type of chocolate you should use. If the cake is moist and you like the texture but you don’t like the flavor of it, then try another brand of cocoa. There are many brands out there and everyone has a different idea of what good chocolate should taste like. It’s a very personal opinion. Some people like a stronger flavor while others will prefer a subtle one. Some people like milk chocolate and others like dark and bittersweet. It’s all out there for grabs!

There are many options when it comes to chocolate. Check for Black Cocoa, Double Cocoa, Triple Cocoa and others. Some are made with a combination of natural and dutch process chocolates, others are known as heavily-dutch and have a stronger chocolate flavor. Believe me, I could go on until my last name changes to Hershey, but then this blog would be very long. At least you get an idea of what is out there and do more research on the subject. Keep in mind also that cocoa powders have different flavors and some of them contain more fats or starches and this will give you either a more moist cake or drier cake. All of these things are important if you are still trying to find your perfect cacao for your cakes.

The whole point behind this blog is to let you guys know that if you have tested a recipe for a chocolate cake and maybe the crumb of the cake was great or it was perfectly moist, but the flavor was a little off, then maybe you need to change your cocoa and test it again. If you are not happy with the crumb of the cake but the recipe has great reviews, maybe you need to try another cocoa. The wrong cocoa can change the crumb and moisture of a cake.

Valrhona Pure Cocoa Powder, 8.8 oz.
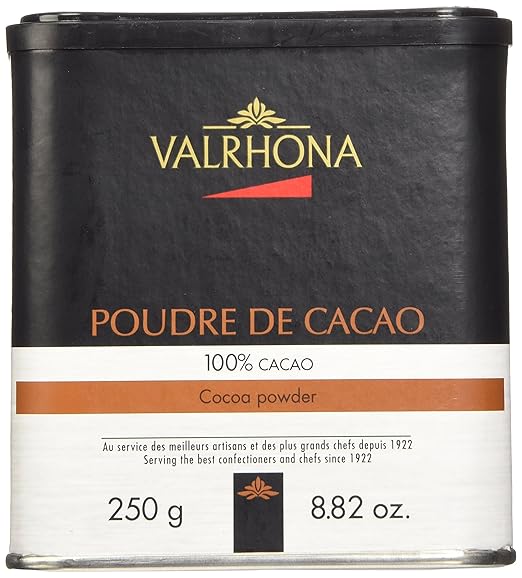
Some of the most well known companies are Vahlrona, Callebaut, Guittard and there are others. Hershey’s and Ghirardelli are the most easily found in supermarkets. In a pinch I have used Hershey’s Special Dark (this one combines natural and dutch chocolate in it). Keep in mind that the other Hershey’s sold is natural cacao so if you have used it in a cake recipe that calls for dutch cacao, then the outcome might not has been the expected one. On the least expensive ones, the Hershey’s Special Dark has a dark (duh) color and pretty decent flavor and I like it a lot better than the original one at least on the cake recipes I have used it in. I will add that I have used the Hershey’s Natural Original and liked the taste better than the Hershey’s Special for the chocolate buttercream recipe I have in my website. Like I said, testing will be your best friend until you find your favorite one.

If you happen to be a chocolate snob, then go for the higher quality one. Keep in mind that most of the times you might have to order those online and they have a higher price. For those who are chocolate lovers, sometimes the flavor is worth the extras. My job is not to sell you a specific product but to let you know that there are options. Experiment! I was sent by a super awesome lady overseas, a cocoa call Droste and it was super delicious. Worth checking it out!Droste (4 pack) Cocoa from Holland

I will add that if you get one cocoa that didn’t work for a recipe, this doesn’t mean it’s a bad one. It might just not be the right recipe for that specific cocoa. Test it with other recipes to see how flavor changes and what works best for your tastebuds. Some companies might even have recipes that work well with their own products and that might be worth a try.

We all grew up with what we think good chocolate should taste like. From country to country, or even state to state, you will find there’s a huge difference on what people prefer. At the end of the day it’s your own personal search. Hope you find your favorite cocoa. To paraphrase Agent Mulder from the X Files, “the cocoa truth is out there!”

I hope you enjoy this Blog, until next one.. ta ta!

Edna


Advertisement

The Quilted Cake Design

I posted a new cake tutorial for a cake design I made. I love to get creative sometimes and do cakes that are amazing but the truth is that most clients either can’t afford them or they just want something simple. And to be quite honest, simple cakes that are fast can sometimes make more money than all those super busy complicated cakes that take a lot more time to make. For as much as I love to get fancy, simple designs are heaven on a busy week.

Quilted cakes have been in style for many years. I have made so many of them with different patterns and I can say that to this day, brides still love them. They are simply classic and elegant.

I got this new mold from Marvelous Molds and I love the design. In the video I did the cake without using dragees and the cake looks amazing. The really cool thing about this mold is that you can actually place the dragees on the mold before placing the fondant.

Gold Dragees

I won’t lie, I was a bit worried about doing this. All I thought was that the dragees were gonna be rolling everywhere and they where not gonna stick to the fondant.

I placed each little ball on each hole and then I placed the fondant on top.

I used no glue at all, and to my amazement, all the dragees stayed in place. You know how many dragees I had to place in cakes, one by one with pliers or tweezers over the course of almost 22 years???? All I can say is that I was super impressed and I love the fact that this mold can be used with or without the dragees.

Since this was a square cake, I wanted to finish the borders with some gold details. I decided to use the Vibrance Brooch Mold. I wanted to cover the edges and this mold is the perfect height for this purpose. To finish it I painted it in Gold Highlighter. I also cut this mold and added pieces of it to the board to give it a finished look that made everything cohesive.

Vibrance Brooch Mold

Most of the time I like to finish my cakes with whatever color of flowers I have to use and then I combine them with filler flowers in other colors. But for this cake, the red roses made a beautiful statement. No filler flowers used unless it was smaller roses, buds or leaves. I have a tutorial on how to make roses with circle cutters that I made so many years ago and it’s still a great way to get started if you want to play with gumpaste roses and you all you have are circle cutters. I also have a DVD with 4 hours worth of roses that include different ways to make them; how to make leaves, buds, how to color them and even how to make thorns.


Marvelous Molds is giving away 3 of their new molds and the rules are these ones; Go to Instagram and follow Marvelous Molds and Design_Me _a_Cake. Marvelous Molds is choosing a winner that does all the steps above so make sure you do that and I will post the winner as soon as I find out. You can also get an extra entry if you tag a friend.

I love how the cake turned out and I know brides love this type of cake. Below I am posting the links for the tutorials or products I used to make this cake. Click on the photo for more info. Click here or on the photo below to go watch tutorial.


I hope you enjoy the tutorial.
Until next Blog, ta ta!

Edna 🙂


Stabilized Whipped Cream Tutorial

Whipped cream is a great addition to any dessert and even though I am allergic to dairy, once in a blue moon I choose to suffer the consequences just to be able to eat some. I figure the swollen eyes and headache are just temporary and since I don’t eat it all the time I can handle the temporary pain. Lol

One of the problems you will find with whipped cream is that it’s not stable. You can use it at the time you make it but it won’t stay fluffy for long. It starts melting. With Stabilized Whipped Cream you can cover a cake and use for piping on the cake or desserts.

There are a few ways to stabilize it. Some people use cornstarch for a quick fix. I am not a big fan of the taste but the others options used also run along the cornstarch idea. These other options include Powder Milk and Powder Pudding Mix. All of these contain cornstarch. Even if you use just confectioners sugar, you will find that there is cornstarch in it. For me the most stable one is the gelatin recipe, but as you know, I am all about giving you guys all the info.

Making whipped cream is not really difficult, but I do hear people that encounter problems like lumps, whipped cream that’s too runny and other issues. I’ll try to offer some tips that might help, but if you have a fail, just keep in mind that Rome wasn’t built in a day. My advice is to try again. Maybe you used the wrong ingredient, took a wrong step, or missed something. Try again! This is not a new recipe and it works for many, so don’t give up, and try to figure out what went wrong for you.

First for the gelatin, you will need unflavored gelatin. Knox Brand is the most easily found in supermarkets. Great Lakes has another one that is Kosher. A bit more difficult to find but you can always try Amazon. As an added bonus, gelatin is a good source of collagen. Great for skin, nails and hair. If you can’t eat gelatin, you can try Agar-Agar as a thickening agent. For Agar-Agar you really don’t need water. Just dissolve it in milk and make sure that it’s mixed well and then strained to avoid lumps.

Usually you want to sprinkle the gelatin evenly over water.  I don’t know about you guys, but somedays I am just not in the mood to take it slow and I just drop it too fast on the water. Unfortunately, if done improperly, it won’t soak evenly and you will get some lumps. These days I just take a fork and lightly move it to make sure it’s fully mixed. Once the gelatin blooms, it looks like hard jelly. If you want to be safe and properly melt the gelatin without burning it, you can cook it in a double boiler. Some people do it straight in a pan, but if you do this, you will need to cook it on low. You really don’t want to burn it. My favorite and fastest option is the microwave. I cook mine for 30 seconds. Just make sure that the gelatin is clear and fully melted. If you need to cook yours for a longer period, make sure to do it in 10 seconds increments. Once again you don’t want to burn the gelatin. Did I mention that enough? Lol

One of the biggest problems people encounter is adding the warm gelatin to the cold heavy cream. This is where you have to watch yourself. For making whipped cream, you need for your heavy cream to be as cold as you can. Usually it’s even preferred to chill the bowl as well as the whisk attachment. I usually don’t bother too much with that, but maybe in a hot environment it might be a good idea. When working with sugar it’s best to work in areas with air conditioner to avoid issues. If you add the warm gelatin to the cold heavy cream, guess what will happen??? It’ll start getting hard, because that’s what gelatin does when it gets cold; it hardens up. So you can’t let the gelatin cool down all the way because it will start solidifying and you can’t add it when is too hot to the heavy cream because it can get lumpy.

How do I solve this and make sure I don’t have a whipped cream full of lumps? I take some of the heavy cream and leave it at room temperature. Usually around a 1/4 cup will do.

Once I get the gelatin out of the microwave, I leave the gelatin alone and start whipping my cream. This will give the gelatin a few minutes to cool down some. Then once I get the whipped cream to the right consistency, I add the 1/4 cup of heavy cream I left at room temperature to the gelatin and combine that well. This is sure to bring the gelatin down enough so that when you add it to the cold cream, it won’t create lumps.

Another thing I do is to pass the gelatin/ heavy cream mixture through a sifter to ensure I don’t have any lumps in that mix. If you are using a stand mixer, you can slowly pour the gelatin on top of the whipped cream without stopping the mixer. If you have a hand held mixer, just make sure to sift the gelatin before you pour it because it’ll be more difficult to do, since we only have two arms. No matter what, if you watch the tutorial, you will see that I poured the gelatin/heavy cream mixture all at once. I was expecting this might create some lumps since I always use a stand mixer. I can honestly say that it didn’t have one tiny lump. All of it was super smooth. Still, I will advise to slowly pour the gelatin as you mix.

I want to clear up for those who are new to whipped cream, is that you should use a cream that has at least 35% fat in order to get the best results, especially if you want to use it for cakes. It’s confusing when you go to the stores and see all these bottles of cream and not be sure which one to use.

Here are some of the most basic ones but there are others I am not mentioning:

*Half-and-half= 15% fat. In the USA this means that it usually contains 1/2 whole milk and 1/2 cream. It’s not meant for it to be whipped, so save it for your coffee.

*Single Cream= 20% fat. This one has a low fat content. You can use in sweet and savory dishes but it won’t thicken when beaten.

*Light Cream= 18% to 30% fat. It can be used just as half and half and in the higher number of fat content it can be whipped lightly but is not stable. Some people also call this one Single Cream. The fat content will determine its uses, but it won’t ever work for cake.

*Whipping Cream= 30% to 35% Fat. This is where you have to watch for the fat. If it contains less than 30% fat, it will whip up lighter, fluffier and more airy. Great to use over pies and desserts, but the higher content of fat will mean stiffer peaks that are best for piping and covering a cake. So if you get whipping cream, make sure it’s at least 35% fat. Most whipping creams these days are pasteurized in order to extend their shelf life.

*Heavy Whipping Cream= 35% Fat I am adding this one on the list because it’s the one I use. I figure it’s a middle ground between whipping cream and heavy cream. The one I use has exactly 35% fat and works great! With that said, heavy cream is even better when it comes to stiff peaks.

*Heavy Cream= 36-38% Fat. You can also use this higher fat heavy cream for stabilized whipped cream. Higher content of fat will make the mix double in size and tends to hold stiff peaks strongly. This one is great to use for ice creams but it works great for soups and sauces as well without the risk of curdling.

Unpasteurized cream whips much easier than pasteurized. But these days you will find more of the ultra-pasteurized cream because it has a longer shelf life of 60 days before it’s opened.

Pasteurization is a process where they bring the cream to a fast heat of 167 degrees for 15 seconds then cool it down really fast. The ultra-pasteurization process brings the milk to a 280 degree heat and even though it kills bad bacteria, it can take away some of the creaminess in the flavor of the cream. Because of the ultra-pasteurized being heated to 280 degrees, there’s a cooked taste to it and less flavor in comparison to the pasteurized. Also the pasteurized holds better peaks than the ultra but that’s where flavorings and stabilizers help if you find only ultra-pasteurized.When you start working, make sure that the cream is cold as you start and as you mix. If it’s not cold enough, it doesn’t “whip,” it “churns” and we’re not making butter. I suggest to put the bowl and the whisk in the fridge so they’re cold as you mix. If you are in a hot environment, you can place a bowl of ice below your mixing bowl to keep everything chilled. And again remember that if you over mix your whipped cream, you will end up with butter, so keep an eye on it.


This is all basic information that is always helpful, especially for those of you who aren’t used to working with these ingredients. Another important piece of information concerns the sugar. You need to use confectioners’ sugar for this recipe. If you use granulated sugar it will give you a grainy whipped cream. I tested the recipe using Swerve Confectioners for a sugar free whipped cream and it worked really well. So for those of you who are on a keto diet or need to be on sugar-free diet, you can have your whipped cream guilt free! For those of you who don’t know what Swerve is, it’s a sugar replacement that doesn’t raise insulin levels. Usually you would use the same amount as you use for regular sugar. And if you want it sweeter, you can always add more sugar to the mix, no matter if you are using regular sugar or Swerve.

Finally you have to decide on the flavoring. You can use any extract you want for this. I prefer the Clear Vanilla Extract to avoid getting the brown color on the whipped cream, but you can use your regular Vanilla if you prefer. You can also make it chocolatey by adding cocoa or melted chocolate. The sky is the limit with this recipe but the downside to it is that it needs to be kept in the fridge. So if you don’t like cold cake you will need to wait till my next tutorial so I can talk about other options for dairy free whipped cream substitutes.

But for now I think this is plenty of information for you guys. So click here for the full recipe and video tutorial on how to make Stabilized Whipped Cream.

Click here to go watch Tutorial and see full recipe.

I hope you guys enjoy the information. I know is a lot of it but is worth the knowledge.

Until next Blog, Ta ta!
Edna


Goop-Cake Release Recipe

What is Goop? Goop is a cake release mix used for pans so that the cake doesn’t stick to it. I am not sure who created this Goop Recipe but I know is old. I remember years ago working at a custom cake place. The baker had this concoction in a cake pan. She would apply it to the pan and never added flour on top like I used to do when I started baking. That was the way I was taught. You first apply a layer of butter or vegetable shortening and then add a thin layer of flour.

I never liked adding the flour because when the cake was done, I had always some of the powder on the cake and I didn’t like how it tasted. Probably I was adding more than I needed back then but we all learn as we go. I decided eventually to ask what they applied to the pan. That’s the first time I heard about Goop.

Goop has only 3 ingredients and it’s super easy to make. I get lazy sometimes and use spray on my pans but when I am making a lot of cakes, Goop is the only way to go. I always have the ingredients accessible and I can make as much or as little as I need too.

Goop will stay good in a sealed container for around 2 months. I live in a hot and humid area but I always have air conditioner on so if your house is hot, make sure to keep it in a colder area. Oil does get  rancid so keep an eye on that. If you smell something funky just throw it and make a fresh batch. If you prefer, you can save it in the fridge. You can use a pastry brush if you have one but if you don’t, use a piece of kitchen paper to spread it around the pan and it should work just fine.

Click here to watch the tutorial for Goop and to get the recipe.

I hope you enjoy this recipe.

Until next Blog.. Ta ta!

Edna

Bas Relief Tutorial

Bas Relief Cake Tutorial

Seems like everyone is getting sick with the flu and there was nowhere to hide from it. But now that I am better I have to catch up with work. Last week I posted in You tube my latest Tutorial on Bas Relief.
Bas relief is an old technique that is being used a lot these days. Everything old is new again. You can do this technique all over the cake or you can do areas of it. It really depends on what you are trying to achieve. No matter what, it’s a busy look and I can call it even messy when it’s used all over the cake. You can use any mold to do this technique and you can mix them or just be repetitive with the same one.

In the tutorial I am using flowers. If you use smaller molds it can be more time consuming so I used this mold from Karen Davies collection that has big flowers that can cover a lot of area fast. A whole cake can be covered with this technique. But sometimes just one tier is enough to make a cake stand out. If you plan to cover a whole cake with this technique, make sure to add this to the cost of the cake as it will be time consuming.

In the video I used a Mold from Karen Davies. Click on the photo to see if it’s available in Amazon. If they don’t have it,
you can check her website but if you live in USA keep in mind it will be an International order. But if you can’t find the mold, there are many options you can use to make this style of cake.

The photo to the left shows another beautiful mold that has different flowers that you can use to make this type of garden cake. I will be clear that I am not getting paid to sell these molds. I am just showing you a product that I used and liked. You can also use molds you already have at hand to make this type of cake.


I did a 2 tier cake where I show step by step how to decorate the cake and how to make the beautiful bow. I put the tutorial for rent and for sale so you guys can choose what you prefer. I want to do more tutorials but longer tutorials like that are very time consuming and the small amount I am charging will cover the cost of making the longer tutorials. I will still do my You tube tutorials but the advanced tutorials will be including all the steps on how to make a cake. I thought that paying for a tutorial as you want to see it is more convenient than paying a monthly fee and easier on anybody’s pocket. Plus you can choose which tutorials you want to buy.


I added more photos of this cake in the website. Click here to check them out.

If you want to see the Free You tube Bas Relief Tutorial Click here or on the photo below.
To check the step by step tutorial on how to make the 2 tier Cake Click here or on the photo below.
I hope you enjoy these tutorials. Until next one, Ta ta!
Edna 😀


Tylose, Gum Tragacanth, Gum Tex- What are the differences?

This Blog is all about information on those gum products we hear so much about and use in cake decorating. I personally love Tylose. It’s less expensive, easier to find and great quality. But here is the info so you can choose the one you like the most. All of them are gums but as anything in life they will have some differences in outcome so your job is to find the one you prefer. I just did a tutorial to show you guys how Tylose helps change the texture of fondant and how to fix it to the consistency you need. Click to watch here.

Carboxymethyl Cellulose (CMC), is a thickener, binder and stabilizer in a variety of foods. Cellulose is the carbohydrate that makes up the woody parts and cell walls of plants. CMC is a thickening agent made by reacting cellulose (wood pulp, cotton lint) with a derivative of acetic acid. It is not absorbed or digested and is sometimes included in the “dietary fiber” on food labels. Commonly used in food preparation. It’s poorly absorbed by the body but if consumed in large amounts it can create flatulence. Something I would not worry with cake since we really use small amounts of it. The number for this gum is E466

Tylose is a namebrand for CMC. It’s the name I use mostly because it’s the brand I use the most. Tylose is found easier than other gums and the price for it tends to be lower. I have a preference on a specific brand of Tylose because I used others that I found were not of the same quality when I worked with the product. But like everything in life, we all have our preferences so test a few to find the one you like. But keep in mind that purified CMC is a white to buff-coloured, odourless and tasteless, free flowing powder. Less purified low assay types can be off-white to a light brown. I did try one time another brand and the color was less white and the quality of my gumpaste felt different. It was the last time I switch brands. Maybe I am just used to the one I use but I felt a big difference in quality,

Usually it’s often recommended to add 1 to tablespoons of Tylose to 1 pound of fondant. I will say that even though I add Tylose to fondant to create details, the consistency is not the same as if you do a Tylose gumpaste from scratch. It just doesn’t give the same texture or elasticity but some people get used to using it even for flowers. It’s just not my preference and if you are getting started making flowers I would not suggest it either. I think it’s more difficult. Even though you can make flowers from it, elasticity and feel is just not the same. But with that said, it works great for making decorations that need a stronger consistency or even if you need something to dry faster. Tylose works well in areas where there is a lot of humidity.

Gum Tragacanth is another gum. If you are looking for something natural this will be your choice. A bit more difficult to find and can be more expensive. Tragacanth is a natural gum obtained from the dried sap of several species of Middle Eastern legumes of the genus Astragalus. To harden fondant some people will say it takes up to 30 minutes to feel the change in texture. It’s advised to leave it to dry overnight for the best results. It’s recommended around a teaspoon of Gum Tragacanth per 1 pound of Fondant. Something you have to keep in mind is that it will give a yellowish tone to white pieces. This is one of the reasons I prefer using Tylose/CMC. The number for this gum is E413.

Gum-Tex is the name for the gumpaste powder sold by Wilton. Recently I saw that they added the name Tylose to the bottle. I have been giving the numbers for each gum I posted so you can see that all products are not the same. Wilton used to call their product just Gum-Tex but now they added the Tylose name to it. But Gum Tex is not made with CMC. Gum-tex is made with Karaya Gum. The number for this E416. It’s made from the dried sap from the trunk of the Stercuila trees which are native to India. Yes it’s a gum, yes it works to make gumpaste but here is my opinion. The gumpaste tends to feel grainy and dry. It’s not my favorite one.

All of these are gums and most of them have recipes that work the best with each of them or people have created their own recipes to use them. Some of them can be interchangeable but you might feel the difference in the outcome of the recipe. I have a recipe for Tylose gumpaste in my website that works wonderful with Tylose gumpaste.
I did made a mistake in the video on the amount of teaspoons ( I wrote tablespoons instead of teaspoons in the video  😦 ), so do make sure to read the tips and recipe in my website before you make it. This recipe was posted by the company that I buy the Tylose from and I was told it was created by a lady call Jill Maythan. It’s my favorite recipe and I used it for more than 21 years and will keep using it.

All this gums are food safe and used in many food items in the market. So you can use them in your fondant. Most of them are Kosher but do check the product you use to make sure they do.

In the video tutorial I show how adding Tylose changes the texture of the fondant as I work with it. It’s pretty neat to see. I know I am using a bigger amount of the powder for a small piece but even though you can just wait and let the fondant rest so it hardens, you can see that it would be ok if you add just a bit more and you don’t have to wait if you are in a hurry. It really depends on you. You can save time by using more or you can use less product if you would rather wait. Most of the time I do this it’s for pieces that need to dry fast like bows or maybe things I need to mold. Since I know it will get harder as I work with it, I just work fast and when I feel I can barely knead it, I add more fondant to it to soften it.

I will suggest to play with it and find the consistency you like for whatever you are working for. Also keep in mind that it might react differently depending on the fondant you use. If you are using for example Fondarific, which is chocolate based fondant, it will take a lot more. If you are using Satin Ice, it will take less since it has no chocolate in it. So if you are playing with a new fondant that you never used before, do a test and see how it reacts. If you add too much to certain fondant, it can make it  dry, reason why I always suggest to do smaller amounts.

If you need to make a fondant that requires a lot of color, you can always add a bit of Tylose to it to avoid it getting softer. If you feel more comfortable, do a test first and see how your fondant reacts. Sometimes colors might change the consistency of certain brands of fondant. If you find yourself with a fondant that is too dry and cracks too much, add just a bit of glycerin. If the glycerin doesn’t help, try modeling chocolate. Add small amounts because if you add too much your fondant can get too soft and some people like softer fondant but other people don’t. To learn what’s best for you, you need to test what you like and all I can do is offer suggestion on things I use that work for me.

Once you have added Tylose or Gum Tragacanth to your fondant, you have to keep un mind that it will dry faster. You can store a regular fondant in a tub for months. But once you add Tylose to it, it can dry in a matter of days and that amount will change depending on how much you added. If you added just a bit it will last longer but when you add a lot, it will be hard as a rock by the next day. You can seal it in plastic wrap but also place it in a Ziplock bag so it lasts longer. You can also add more fondant to it to disperse the Tylose so it lasts longer. I prefer to do small amounts that I will use promptly and avoid having to deal with fondant that is dry hard as a rock.

I hope I have not forgotten anything in this Blog. It’s a lot of information but sometimes it’s better to have the knowledge than to deal with questions and problems that we don’t know how to solve. Hopefully you have some answers and this will help you conquer any problems as they arise. If you don’t have Tylose available in your area I always have it available in my webstore. Click here to get Tylose. I will post in the website under the video links to where you can find the other gums.

Click here or on the photo below to watch the Fondant Tylose Tutorial

I hope you enjoy the tutorial. Until next time TA TA!!!

Edna 🙂


The Knitted Cake – Product Review

I love to knit and crochet and I just got beautiful molds that are just perfect to create a cake that looks like you have knitted a sweater for it. With fall coming, tons of ideas roll in my head on how I can use these molds!

I love molds and I understand that some people don’t like to spend the money on molds because they might be able to do a design without one. For a person that don’t do cakes often and has the time to spend tons of hours on a cake, saving the money seems fair but for those who have many cakes to do in a day, the right mold can make you move faster, so you don’t have to spend so much time making just one cake.

A cake that looks like it has been knitted is one of those designs that can take a lot of time and effort if you do them without a mold. You would have to use an extruder and take 2 strands, twisting them together and then placing it on the cake, one line at a time, so you can cover a whole cake. It will look beautiful, but the hours spent doing that is not something I look forward too. I love making cakes, but I love to enjoy my life too.

Another way to do a knitted look it is by creating your own mold. It’s a fun thing to play with and create your own molds. But let’s face it, getting the materials for this can get expensive and you need to keep in mind that you need to treat the thread so it can be molded properly (Basically you have to buy a product to spray on the knit so it don’t stick to the mold). It can be time-consuming and not necessarily cheaper option, but if you like to play with making your own molds it can be a fun craft.

I like to use many techniques in my cakes. I will never say no to something that will save me time just because someone in the world might think is better to do things this way or that way. If I can make it fast with a mold I will. I also have learned to use the same mold for different purposes to create versatility on the cake by cutting the molds or simply manipulate the pattern to create another design with the same mold. I see them as an investment that will save me time so I don’t have to spend days making a cake that won’t pay me for all that time I spent making it. I say this all the time and I will say it again: “Time is Money” and my free time means I can relax and enjoy life. Something I value very much.

Sometimes I get molds because I use them over and over in my designs. Sometimes I get them because the mold has a unique pattern and sometimes I get them just because they are gorgeous. Whatever the reason I get them for my pleasure and my customers cakes.

You can say it’s one of those addictive habits that I won’t give up easily…lol. Just like my stash of fabrics in my sewing room. I love that it’s there and I can use it at any time I want especially for those last minute outfits you want to create.

For this video I used the Braided Knit Border and the Classic Knit. I think all of them can be used by themselves and make beautiful cakes, but I really wanted to combine them for this cake tutorial.

I also added a brooch detail  using a mold call Devonaire Brooch and Medium Leather buttons just to finish the look. I painted them in Silver highlighter to brighten the whole cake and the Gumpaste Flowers just soften the whole look. These I teach in my DVD’s.

Marvelous Molds is a great company and constantly creates new and innovated molds that I have yet to encounter to be poorly made. I have used their products since they started making their fabulous molds and they haven’t failed me yet. So my review for this knitted mold in particular is 5 STARS!!! I have worked with many molds throughout the years and a mold with a good design and impression quality of the silicone is very important. I have tested some of the products that are coming from China that are being copied from good companies, but the silicone impressions don’t have the same quality, complete disappointment. It can be a hit or miss with them so I stay with the companies I trust to avoid losing out on money, and save myself from the torture. I have to do a tutorial-review on those products coming from there.

I love the finish look of this cake and I’m so excited to use these molds! Not only for my fall and christmas cakes, but for baby cakes also. Feel free to leave me comments below for products that you want me to review. If it’s accessible to me I can try to add it to my list. Click here to watch the tutorial or click on the photo below.

Until next time, Ta Ta!!!

Edna


*The small earnings from advertisements in this Blog are used towards making more tutorials. Reviews are 100% honest and I stand by them. 

Decorating the Cake Board

Decorating the Cake Board

I just posted a new tutorial in You Tube. This is a basic tutorial on how to cover a board but I wanted to add a bit more detail on how to decorate it too. I love how a cake looks when the board is decorated. It brings the cake to another level.

I worked so many years decorating cakes and adding fondant to a cake board used to be something you do as an extra detail for high-end cakes. These days, although the regular people who buy cakes don’t necessarily know about this detail, the cake community has expectations for all cake boards to be decorated.

I will add fondant to cakes that are high-end. Most of those cakes are well paid and they do require a finish look. With that said there are other times that I don’t cover a cake board unless I am paid for. Package cakes for example, are cakes that are part of a deal that some venues add as part of the contracts with brides for their weddings. These cakes are low-budget cakes and in here that time that you might spend covering a fondant board will be used more wisely in making another cake that will make more money.

Covering a basic cake board can be done fast. But add the time of looking for the fondant, coloring it, kneading it, rolling, placing it on the board, cutting the excess, smoothing it and either the time that it needs to dry or the oven time you have to use to make it dry faster. All of this is time you use in making a board. Let’s say it takes 15 minutes overall to do all this, ( that’s without taking in consideration drying time). In those 15 minutes I use to cover that cake board, I can torte and ice a cake and with 10 more minutes I can finish a basic cake that I can charge around between $30 to $60 dollars depending on the size of it.

Stitch Edge ReliefSo taking all of that in consideration and adding to that you may have many other cakes to make, you do have to take in consideration that time and the cost of your time that needs to be paid.

I love a cake board covered. It makes a huge difference. But I do make sure I get paid for this. If it’s not in the budget of the bride, then is not in my budget either. I have had times where I have done a cake that the bride didn’t had the budget for the board and I decided to add the fondant to the board just because I wanted a great picture. But that I did because I wanted a great photo for me.

Boards are supposed to be covered for cakes that are high-end or cakes that are part of a cake competition, or simply just for show. But don’t feel bad if you are doing a cake for a bride on a budget that couldn’t pay for the board or just for a simple party cake. At the end of the day a custom cake shop need to make sure rent, paychecks and supplies are covered more than anything else.

For low-budget cakes, I use your regular cake drum that
you still need for a cake,
so the cost won’t make a difference when it comes
to that. If you are covering  homemade boards with fancy foils, make sure to find the big rolls that are sold wholesale and much cheaper than the ones you get at craft stores. Some people use pretty papers and cover them with contact paper but be careful with this. Contact paper is not food safe so the cake should not be in contact with it at all.


At the end of the day, everyone has their own option. If you have the time and preference to cover your boards, go for it. If on the other hand youfeel that it needs to be paid as part of your time and not all people can afford it, then don’t stress about it. In 22 years of making cakes I have never had a person complain about it.

If they want a cake board covered, they will pay for it. If they don’t have the money, they won’t care about it. As long as you make them a beautiful and delicious cake, they will be happy.


Bass Relief Cake

If you make cakes for fun, go ahead and cover your cake boards and make your cakes look more amazing with the finish look. I know it makes me happy to see a finished cake from top to bottom, but I do understand why sometimes boards are not covered. There’s a whole different angle when it comes from smaller shops that are starting to make cakes or maybe are located in an area that pays less money and they need to count each penny they earn and use. Running a bakery is not an easy task and only those who are successful at running one, know the reality behind it.

Click here or in the photo to go see the tutorial. In the website I posted links for the products I used in making this tutorial in the tutorial page.


I hope you enjoy this tutorial and Blog.
Until next time, ta ta!

Edna 🙂


Simpress Molds- Tutorial and Review

I had to make a cake a couple of weeks ago and I decided to use this new product from Marvelous Molds called Simpress.

I love anything that makes my work fast, pretty and easy. This product it’s pretty cool. It covers the cake fast with a beautiful design and it’s pretty easy to use. It comes in 3 different designs at the moment and I am hoping they come with new styles soon!

You can place this over buttercream or fondant and it joins really well at the seams. It measures 4 inches tall, so it covers your standard cake but you can stack each piece if you need it for taller cakes.

I used a dummy for this tutorial and I showed how you can apply the mold in 2 different ways. Since it was a dummy, it was covered in fondant, but the cake above was made in buttercream and it worked just as well. I do advice to place the cake in the fridge and let the buttercream harden up before you place the mold over it.


As you can see, the side edge of the mold it’s not even. This is so you can place the next mold side-by-side and align the pattern creating a continuous flow which eliminates joint lines. In the video I used the Jubilee Sequin Mold and I’m totally loving it.

In the tutorial, I show you a way to finish the back of the cake where the mold doesn’t meet. All cakes have a back side; I just tend to finish it in a straight line for those times the molds don’t meet at the back. Also, you can always add buttons, use an extruder machine to create a delicate rope or even cover it with single sequins if you want to hide it.

I finished the top edge with a line of cutout circles that I made with a piping tip #12. Then I made a hole with a needle. I did add a bit of Tylose to the fondant so I could move faster since the Tylose hardens the fondant and makes it easier to cut.


These patterns come alive with some luster dust, so feel free to paint them with your favorite colors. To make this easy, I tend to have the base color as close as I can to the color for the luster dust I am using.I love how this cake turned out. Click here to watch the tutorial I made for this tool.

Click here to go watch video.

I hope you enjoy the blog and tutorial.
Until next time, Ta ta!
Edna 😀


Here are some of the other tools I used for this cake.
Click here for the top border cutter painted in gold.
Click here for Gold highlighter.
Click here for Luster Dust.
Click here for Pearl border mold.
Click here for Edible Images from Icing Images.
Click here for Marvelous Molds or click on the photos below.

Symmetrical Sequin Simpress


Pretty in Pearls Simpress


Sequin Jubilee


*There are links posted in this Blog that I will earn a very small percentage of their sales. I only promote products I love and believe in, and products I use. The commission earned will be used towards new tutorials.


Moist White Cake Recipe

Moist White Cake Recipe

This is my favorite White Cake Recipe. This cake is moist and has a great crumb. It pairs great with anything but I love it mostly with fruit fillings. My favorite one would be Raspberry Jam which I do from scratch and I will share the recipe soon.

Here is the link to the recipe and the tutorial. Click here for, Moist White Cake Recipe.

Moist white cake recipeI made a step by step tutorial on this cake with very detailed information on how I make it. This cake will work great for stacking but I don’t suggest using it or sculpting cakes. Most white cakes tend to be delicate and crumb more than any other cakes and that is something you don’t want to deal with when you are sculpting a cake.

I will also add that this cake does shrink some and I don’t suggest to use it with cupcakes. If you live in high altitude, keep in mind that my recipes are not made in that condition so make sure to do the necessary adjustments so it works for your area.

I give a lot of extra tips in this tutorial that I use when I am baking cakes that you guys might find useful. So I do suggest to watch the video and follow the steps for making this cake. Click here to watch video and get recipe.

Remember, baking is a science and following instructions are important. I have made this cake many times and have tested different techniques and I posted the one I love the most. If you have your own way of baking and you get a successful cake, feel free to share with us in the comments! If it didn’t work, then make sure to try it my way.

Hope you enjoy the recipe! Until next time, ta ta!

Edna 😀