This Blog is all about information on those gum products we hear so much about and use in cake decorating. I personally love Tylose. It’s less expensive, easier to find and great quality. But here is the info so you can choose the one you like the most. All of them are gums but as anything in life they will have some differences in outcome so your job is to find the one you prefer. I just did a tutorial to show you guys how Tylose helps change the texture of fondant and how to fix it to the consistency you need. Click to watch here.
Carboxymethyl Cellulose (CMC), is a thickener, binder and stabilizer in a variety of foods. Cellulose is the carbohydrate that makes up the woody parts and cell walls of plants. CMC is a thickening agent made by reacting cellulose (wood pulp, cotton lint) with a derivative of acetic acid. It is not absorbed or digested and is sometimes included in the “dietary fiber” on food labels. Commonly used in food preparation. It’s poorly absorbed by the body but if consumed in large amounts it can create flatulence. Something I would not worry with cake since we really use small amounts of it. The number for this gum is E466
Tylose is a namebrand for CMC. It’s the name I use mostly because it’s the brand I use the most. Tylose is found easier than other gums and the price for it tends to be lower. I have a preference on a specific brand of Tylose because I used others that I found were not of the same quality when I worked with the product. But like everything in life, we all have our preferences so test a few to find the one you like. But keep in mind that purified CMC is a white to buff-coloured, odourless and tasteless, free flowing powder. Less purified low assay types can be off-white to a light brown. I did try one time another brand and the color was less white and the quality of my gumpaste felt different. It was the last time I switch brands. Maybe I am just used to the one I use but I felt a big difference in quality,

Usually it’s often recommended to add 1 to tablespoons of Tylose to 1 pound of fondant. I will say that even though I add Tylose to fondant to create details, the consistency is not the same as if you do a Tylose gumpaste from scratch. It just doesn’t give the same texture or elasticity but some people get used to using it even for flowers. It’s just not my preference and if you are getting started making flowers I would not suggest it either. I think it’s more difficult. Even though you can make flowers from it, elasticity and feel is just not the same. But with that said, it works great for making decorations that need a stronger consistency or even if you need something to dry faster. Tylose works well in areas where there is a lot of humidity.
Gum Tragacanth is another gum. If you are looking for something natural this will be your choice. A bit more difficult to find and can be more expensive. Tragacanth is a natural gum obtained from the dried sap of several species of Middle Eastern legumes of the genus Astragalus. To harden fondant some people will say it takes up to 30 minutes to feel the change in texture. It’s advised to leave it to dry overnight for the best results. It’s recommended around a teaspoon of Gum Tragacanth per 1 pound of Fondant. Something you have to keep in mind is that it will give a yellowish tone to white pieces. This is one of the reasons I prefer using Tylose/CMC. The number for this gum is E413.
Gum-Tex is the name for the gumpaste powder sold by Wilton. Recently I saw that they added the name Tylose to the bottle. I have been giving the numbers for each gum I posted so you can see that all products are not the same. Wilton used to call their product just Gum-Tex but now they added the Tylose name to it. But Gum Tex is not made with CMC. Gum-tex is made with Karaya Gum. The number for this E416. It’s made from the dried sap from the trunk of the Stercuila trees which are native to India. Yes it’s a gum, yes it works to make gumpaste but here is my opinion. The gumpaste tends to feel grainy and dry. It’s not my favorite one.
All of these are gums and most of them have recipes that work the best with each of them or people have created their own recipes to use them. Some of them can be interchangeable but you might feel the difference in the outcome of the recipe. I have a recipe for Tylose gumpaste in my website that works wonderful with Tylose gumpaste.
I did made a mistake in the video on the amount of teaspoons ( I wrote tablespoons instead of teaspoons in the video 😦 ), so do make sure to read the tips and recipe in my website before you make it. This recipe was posted by the company that I buy the Tylose from and I was told it was created by a lady call Jill Maythan. It’s my favorite recipe and I used it for more than 21 years and will keep using it.
All this gums are food safe and used in many food items in the market. So you can use them in your fondant. Most of them are Kosher but do check the product you use to make sure they do.
In the video tutorial I show how adding Tylose changes the texture of the fondant as I work with it. It’s pretty neat to see. I know I am using a bigger amount of the powder for a small piece but even though you can just wait and let the fondant rest so it hardens, you can see that it would be ok if you add just a bit more and you don’t have to wait if you are in a hurry. It really depends on you. You can save time by using more or you can use less product if you would rather wait. Most of the time I do this it’s for pieces that need to dry fast like bows or maybe things I need to mold. Since I know it will get harder as I work with it, I just work fast and when I feel I can barely knead it, I add more fondant to it to soften it.
I will suggest to play with it and find the consistency you like for whatever you are working for. Also keep in mind that it might react differently depending on the fondant you use. If you are using for example Fondarific, which is chocolate based fondant, it will take a lot more. If you are using Satin Ice, it will take less since it has no chocolate in it. So if you are playing with a new fondant that you never used before, do a test and see how it reacts. If you add too much to certain fondant, it can make it dry, reason why I always suggest to do smaller amounts.
If you need to make a fondant that requires a lot of color, you can always add a bit of Tylose to it to avoid it getting softer. If you feel more comfortable, do a test first and see how your fondant reacts. Sometimes colors might change the consistency of certain brands of fondant. If you find yourself with a fondant that is too dry and cracks too much, add just a bit of glycerin. If the glycerin doesn’t help, try modeling chocolate. Add small amounts because if you add too much your fondant can get too soft and some people like softer fondant but other people don’t. To learn what’s best for you, you need to test what you like and all I can do is offer suggestion on things I use that work for me.
 Once you have added Tylose or Gum Tragacanth to your fondant, you have to keep un mind that it will dry faster. You can store a regular fondant in a tub for months. But once you add Tylose to it, it can dry in a matter of days and that amount will change depending on how much you added. If you added just a bit it will last longer but when you add a lot, it will be hard as a rock by the next day. You can seal it in plastic wrap but also place it in a Ziplock bag so it lasts longer. You can also add more fondant to it to disperse the Tylose so it lasts longer. I prefer to do small amounts that I will use promptly and avoid having to deal with fondant that is dry hard as a rock.
I hope I have not forgotten anything in this Blog. It’s a lot of information but sometimes it’s better to have the knowledge than to deal with questions and problems that we don’t know how to solve. Hopefully you have some answers and this will help you conquer any problems as they arise. If you don’t have Tylose available in your area I always have it available in my webstore. Click here to get Tylose. I will post in the website under the video links to where you can find the other gums.
Click here or on the photo below to watch the Fondant Tylose Tutorial
I hope you enjoy the tutorial. Until next time TA TA!!!
Edna 🙂


 say you are creaming your butter and sugar and it looks perfect. Then you add cold eggs. The cold eggs will affect the butter making it hard again and creating lumps of butter creating an uneven batter. Another thing that is recommended is to add one egg at a time and mix well before adding the next one. That way you create a batter that is properly emulsified and aerated. So when it comes to cold ingredients, make sure that they are at room temperature so you end up with a good outcome.


 Frame Mold
 Vintage Art Decor
 Cake Dummy
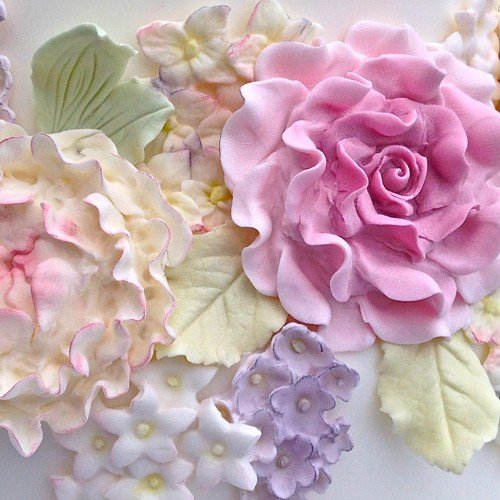
 Gumpaste Flowers