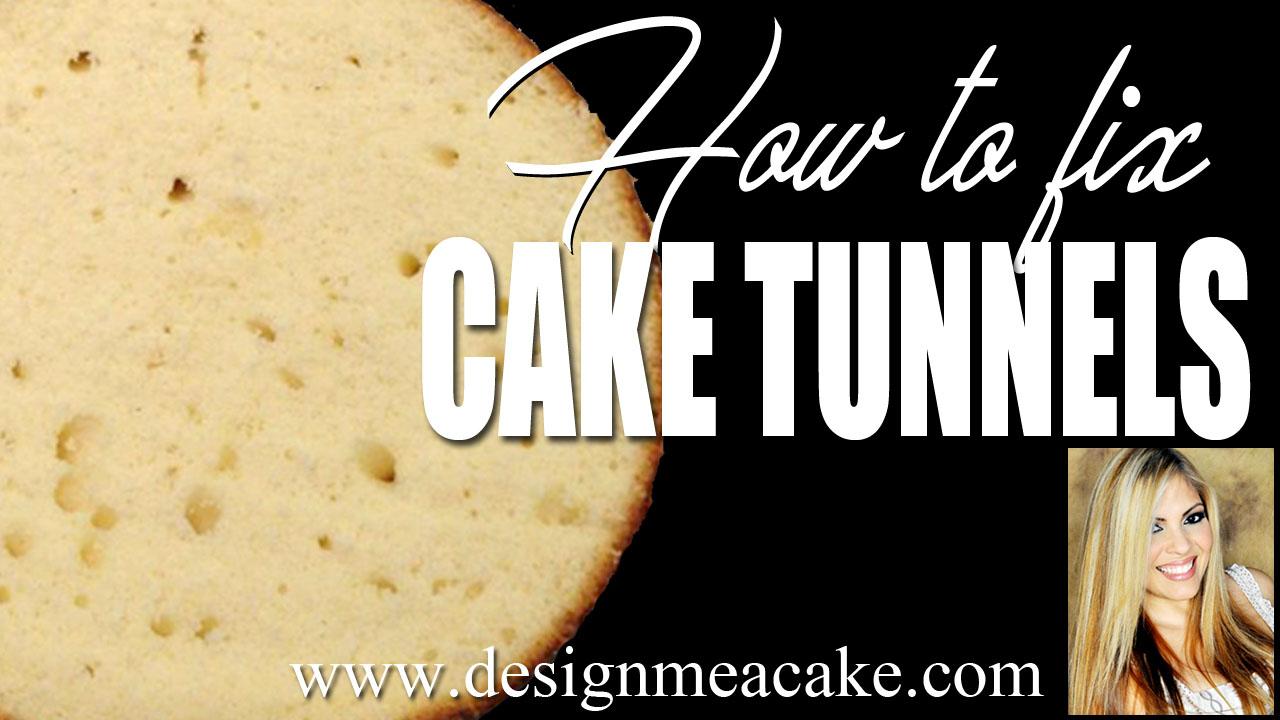
If you love to bake you’ve surely encountered this problem; cake tunnels. There are many reasons why this can happen so you have to test and see what will work best for you in order to solve the issue. Cake tunnels might not affect the flavor of a cake but we bakers like to have a nice crumb on our cakes, and tunnels are really not attractive. If they’re too big they can change the texture of the cake and we don’t want that either.
So let’s go through a few things you can check to ensure you have a cake with an even crumb.

Eggless Cake Recipe Tutorial
The first thing you might want to make sure is not to overmix a cake batter. Over mixing can create gluten formation. I won’t go into the science of gluten so I don’t make this a lengthy blog. If you’re overmixing your cake batter, it can create the gluten. The gluten combined with the liquids (water or milk), plus your chemical leaveners (baking soda or baking powder), can produce bigger pockets of air instead of the tiny pockets we are looking for. This is why we avoid over mixing the batter.
With that said, the next thing I will mention is your chemical leaveners. If you’re not over-mixing your batter, then it’s a good idea to make sure that your cake recipe contains the correct amount of baking powder and or baking soda. Too much of these ingredients can create tunnels as well. If your recipe has a normal amount of it then do make sure that the ingredients are dispersed all over the dry ingredients as evenly as you can. This is why some chefs recommend sifting the dry ingredients up to 3 times. I know we don’t like to hear that but there’s always a reason why things are being recommended. The reason for sifting 3 times is to make sure that all the dry ingredients are thoroughly mixed together. So whether if you want to sift 3 times or just once, do make sure you mix all your dry ingredients well.
The next step is to make sure is that your cold ingredients are at room temperature. Let say you are creaming your butter and sugar and it looks perfect. Then you add cold eggs. The cold eggs will affect the butter making it hard again and creating lumps of butter creating an uneven batter. Another thing that is recommended is to add one egg at a time and mix well before adding the next one. That way you create a batter that is properly emulsified and aerated. So when it comes to cold ingredients, make sure that they are at room temperature so you end up with a good outcome.
There are different ways of mixing cake batter. I usually do the Creaming Method of Mixing in my cakes but there are other methods used, like the 2-stage Reverse Mixing Method (mostly used in high ratio cakes) as well as another method called the Muffin Method Mixing. I might do another blog to explain each method, but for now, I will mention that the way you are mixing your cake batter might create tunnels too. So keep that in mind.

Check for my favorite cake recipes here!
Another thing to watch out for is a thick batter. When the batter is thick, it’s harder to pour and spread in the pan. Some people feel the need to add more liquids depending on the recipe and trust me, I’ve done recipes that I agree need more liquids but some recipes are great tasting and I don’t like to mess with that.

Moist and Delicious White Cake Recipe Tutorial.
So what do I do for thick recipes when I don’t want to add more liquids? I make sure they are dispersed properly over the pan. So once I pour the batter, I take a knife and go in a zig-zag motion all over the pan. Not only will this help the batter fill in every inch of the pan but it will cut any air pockets in the batter. Once I do this, I bang the pan a few times on the table to make sure the air pockets will rise to the top of the batter.
I’m sure some of you have encountered this problem before and found your own solutions so please feel free to share your ideas. In the meantime, I hope you enjoy this Blog. I’m posting the video below so you can watch it. You can also visit my website for more tutorials!
I hope you guys stay safe, healthy, and keep baking.
Until next Blog, Ta Ta!
Edna 😀