Engagement Cake Design

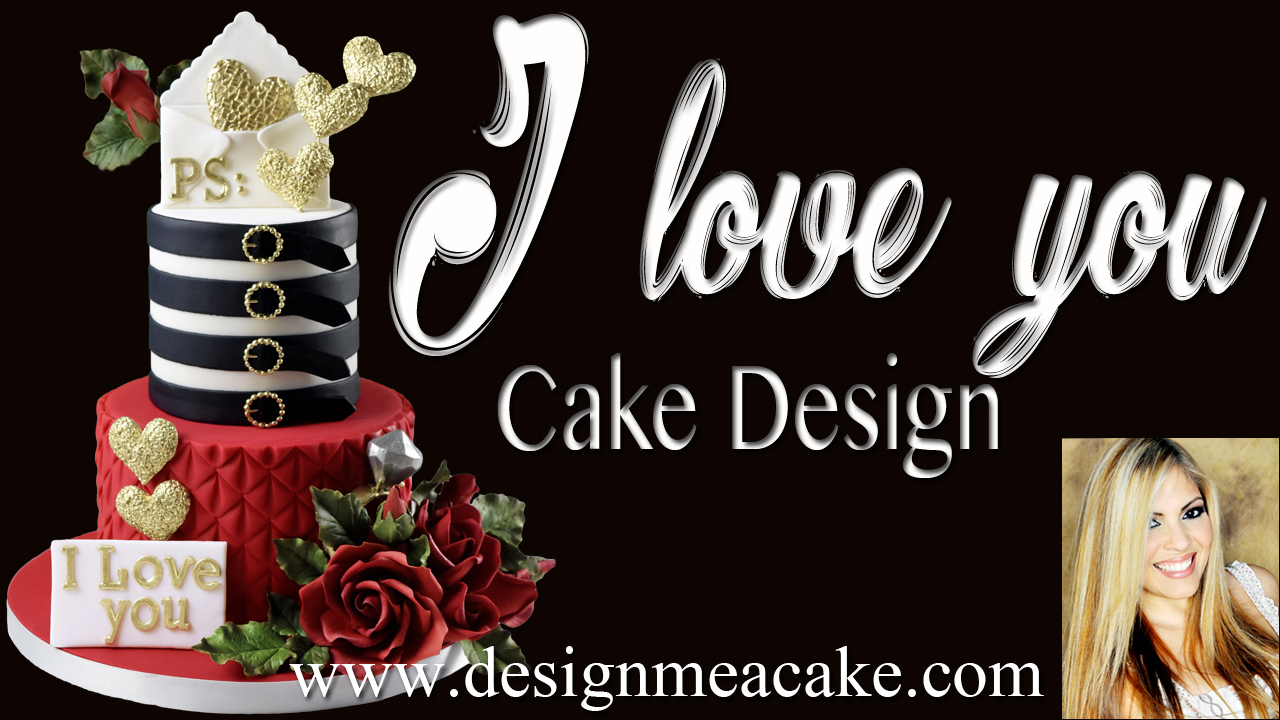
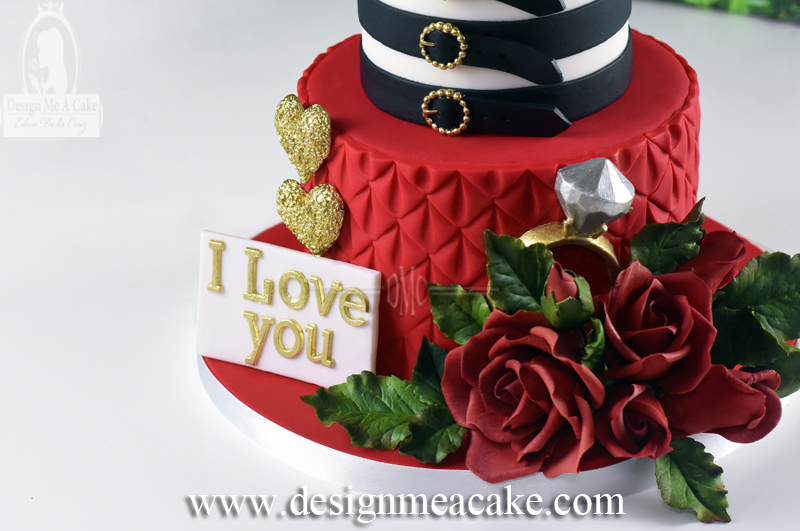
I love everything about this cake. I love the colors, the heart, the envelope, and the concept behind it. Reason why there’s a ring in between the roses is because this was an engagement cake.

The story behind this cake is pretty neat. The “P.S. I love you” comes from the couples favorite movie. I actually love this movie too! The woman in the story (played by Hilary Swank), looses her husband to a devastating illness. The husband knew that his time is coming to an end so for him to show his wife how much he loved her, he took it upon himself and orchestrated a plan to show his true devotion for her even after his death. All of the letters he wrote ended with the “P.S. I love you.”

Even though the story is a bit sad, the movie is really uplifting as throughout his notes he encourages her to move forward in her life, find her passion once again and fall in love all over again. P.S. I love you becomes a really good reminder of not to take anything for granted in life.

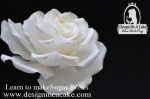
The red rose is an unmistakable expression of love in its entirety. There is also a meaning behind the amount of nine roses on the cake. A flower’s meaning is not specific to its colour and type alone, but also, to the number of flowers you choose. Nine is a symbol of eternal love. You would often give this exact number of roses to those you wish to spend the rest of life with.

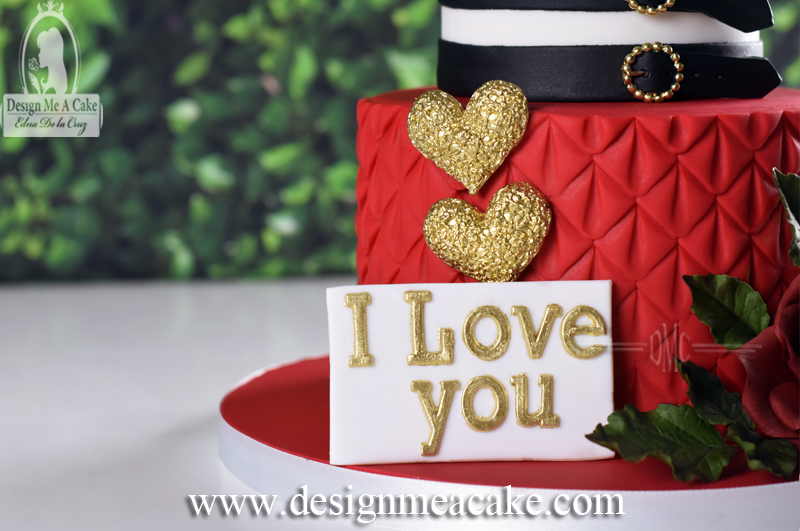
The heart shape is the universal symbol of romantic love. Hearts symbolizes unity, cohesion adoration, femininity, soul connection, sexuality, courage and so much more. This symbol was already established as a symbol of love in the 19th century, but  is most commonly used in this era thru social media. Utilizing emojis that express admiration or adoration for something or someone.

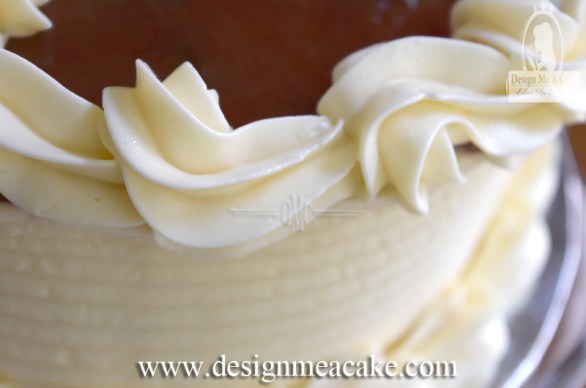
The belt motif relates to a general bond that can be understood as an unbreakable unity and  strength. It also means loyalty, forever and love. There are 4 belts in the upper tier. The number four symbolizes the safety and security of the home, the need for stability and a solid foundation of values and beliefs.

The ring is another symbol of love. It’s made in a circle that has no beginning or end and is therefore a symbol of infinity. It is endless, eternal; just the way love should be. Many people think the origin of this custom stems from an ancient Roman belief that a vein travels directly from the left ring finger to the heart. As we already know, the heart is a symbol for true love.

The color black can have good and bad connotations. This one is used to express the meaning of strength, protection, comfort, seductive, formality and elegance. The red means  passion, seduction, desire and love.

Not all cakes have a symbol for each motif or item placed on the cake. Most people just do a cake that they find beautiful to their taste or will match their decor, but some people make sure that their emotions come across in the most subtle ways to ensure that their other halves know how they feel.

I filmed a tutorial on this cake and I am posting the links for the materials I used on this cake below( scroll down to check them). Click here to see the tutorial or on the photo below.

I hope you enjoy the tutorial and this Blog.
Until next time, ta ta!
Edna 🙂

*Not all products are promoted in this blog; just a few. I do love all the products I used and that’s why I mention them, and earnings are used in making new tutorials. Thanks for the support!

Learn make beautiful Roses


Click here for lettering mold used in this tutorial.

Click here for tutorial on this lettering mold.


Click here for Lavish Loop Mold


Click here for Buckle Mold


Click here for Love Heart Mold

Click here for Filigree Heart Mold

Click here for Gold Highlighter
Click here for Gold Highlighter Tutorial

Gold Highlighter Imperial Gold

Click here for Celebration Envelope Cutter

Celebration Envelope Cutter

Advertisement

Guava Cake Filling


I grew up with a Guava tree in the backyard of our house. It made me a guava lover. This is a very common filling in baking and it’s pretty easy to do. I have a hard time finding the fruit where I live now but I can find the guava paste easily in the Hispanic section of most supermarkets. It’s also easily found in the internet. I will post some links below.

Sometimes you will find the jam but I find it too soft for cakes. Even though you can still use the jam in a cake, I do prefer a thicker consistency which provides a less slippery cake. This is something important that you need to consider when you’re stacking a cake.

I always tell people that if they are using jams as fillings, they have to make sure not to overfill the cake and use a dam. Usually jams have a lot of flavor and a little goes a long way. If you want to have more filling, you can always add more layers to the cake instead of trying to pack a lot of filling the same layer and making everything slippery and hard to work with.

I love using guava paste. You can control how thick or thin you want the filling to be and fix the consistency at any time. You can do this with a food processor, in the stove or the microwave. I do get lazy sometimes and use the microwave, mostly because it works fast. But the other options work well too, especially if you don’t use microwaves or if you don’t own a food processor. I do go through all the steps in the tutorial I posted, (click here for tutorial).

I know some people love to add orange juice as the thinning agent. I personally don’t use it. I feel the guava tastes delicious without adding other flavors but if you like the idea, then go ahead and try it. Some people also like using lemon and others like adding some of the zest of the fruit they are using.

I posted a basic recipe in the website. Even if you prefer using the fruit, keep in mind that you can thin the recipe more if you prefer a thinner consistency just by adding some warm water. If you want a thick consistency, you can warm the paste and add it warm to the cake. This is a matter of preference and that’s why I am giving you the options so you can choose the one you prefer. Do keep in mind that if you plan to use it on top of an iced cake, if the paste is too warm, it will melt the buttercream.

Since I love a medium/thick texture on top of the buttercream, I do warm it a little but not too much. I also make sure that my buttercream is cold. I won’t lie, it’s a bit harder to ice a cake with the thicker paste over buttercream, especially if it’s too hot. So make sure it has a medium consistency so it’s easier to spread. If you already placed it on the cake and it’s giving you a hard time because it’s too thick, you can place the spatula in hot water. Once the spatula is hot, dry it with some paper and this will help smooth out the paste. If this doesn’t help you, then you can take some of the leftover paste recipe and thin it a bit with more water and then add it on top of the thicker paste. This will help you smooth everything out.

You can test all of these techniques but, if you prefer to avoid the trouble, adding the guava on top of the buttercream is just done for looks. You will get enough guava flavor by just adding it as a filling. Then again, people like me love guava that much. I never mind the extra guava flavor! Lol!!!

Check the tutorial for the Guava Filling Recipe. Click here or on the photo for the step by step tutorial.

I am posting below links for recipes you can use with this filling.
I hope you enjoy the tutorial and the recipe.
Until next Blog, ta ta!

Edna 🙂

This is the paste I used in the video.
Iberia Guava Paste


This is a delicious paste. I used it many times!
Goya Guava Paste


Guava Jam is a bit more runny but it can be used.
Guava Jam


Condensed Milk Buttercream it’s super easy.
Click here for recipe and Tutorial


Cream Cheese Buttercream goes great with this filling.
Click here to check this recipe and tutorial.


Moist White Cake Recipe

Moist White Cake Recipe pairs well with fruit fillings.
Click here to check this recipe tutorial.


For those who can eat eggs, this is a delicious cake!
Click here to check this recipe tutorial.


Learn to Ice a cake and also check many other
tutorials for basic cake techniques.
Click here.


Piped Shell Borders Tutorial.

Learn to pipe shells with this tutorial.