Guava Cake Filling


I grew up with a Guava tree in the backyard of our house. It made me a guava lover. This is a very common filling in baking and it’s pretty easy to do. I have a hard time finding the fruit where I live now but I can find the guava paste easily in the Hispanic section of most supermarkets. It’s also easily found in the internet. I will post some links below.

Sometimes you will find the jam but I find it too soft for cakes. Even though you can still use the jam in a cake, I do prefer a thicker consistency which provides a less slippery cake. This is something important that you need to consider when you’re stacking a cake.

I always tell people that if they are using jams as fillings, they have to make sure not to overfill the cake and use a dam. Usually jams have a lot of flavor and a little goes a long way. If you want to have more filling, you can always add more layers to the cake instead of trying to pack a lot of filling the same layer and making everything slippery and hard to work with.

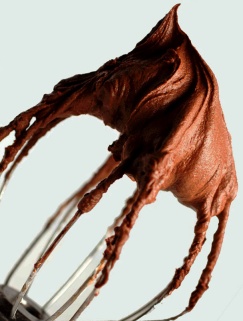
I love using guava paste. You can control how thick or thin you want the filling to be and fix the consistency at any time. You can do this with a food processor, in the stove or the microwave. I do get lazy sometimes and use the microwave, mostly because it works fast. But the other options work well too, especially if you don’t use microwaves or if you don’t own a food processor. I do go through all the steps in the tutorial I posted, (click here for tutorial).

I know some people love to add orange juice as the thinning agent. I personally don’t use it. I feel the guava tastes delicious without adding other flavors but if you like the idea, then go ahead and try it. Some people also like using lemon and others like adding some of the zest of the fruit they are using.

I posted a basic recipe in the website. Even if you prefer using the fruit, keep in mind that you can thin the recipe more if you prefer a thinner consistency just by adding some warm water. If you want a thick consistency, you can warm the paste and add it warm to the cake. This is a matter of preference and that’s why I am giving you the options so you can choose the one you prefer. Do keep in mind that if you plan to use it on top of an iced cake, if the paste is too warm, it will melt the buttercream.

Since I love a medium/thick texture on top of the buttercream, I do warm it a little but not too much. I also make sure that my buttercream is cold. I won’t lie, it’s a bit harder to ice a cake with the thicker paste over buttercream, especially if it’s too hot. So make sure it has a medium consistency so it’s easier to spread. If you already placed it on the cake and it’s giving you a hard time because it’s too thick, you can place the spatula in hot water. Once the spatula is hot, dry it with some paper and this will help smooth out the paste. If this doesn’t help you, then you can take some of the leftover paste recipe and thin it a bit with more water and then add it on top of the thicker paste. This will help you smooth everything out.

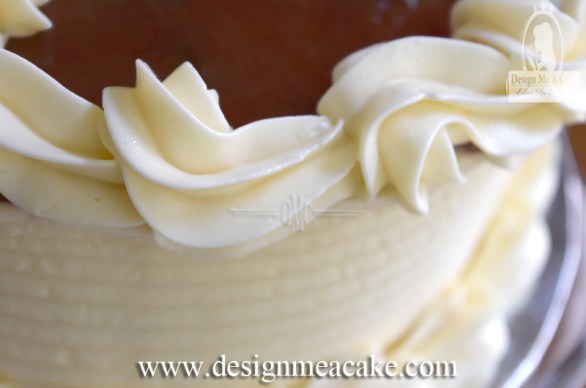
You can test all of these techniques but, if you prefer to avoid the trouble, adding the guava on top of the buttercream is just done for looks. You will get enough guava flavor by just adding it as a filling. Then again, people like me love guava that much. I never mind the extra guava flavor! Lol!!!

Check the tutorial for the Guava Filling Recipe. Click here or on the photo for the step by step tutorial.

I am posting below links for recipes you can use with this filling.
I hope you enjoy the tutorial and the recipe.
Until next Blog, ta ta!

Edna 🙂

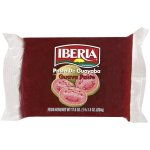
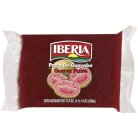
This is the paste I used in the video.
Iberia Guava Paste


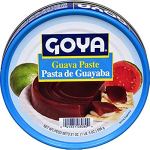
This is a delicious paste. I used it many times!
Goya Guava Paste


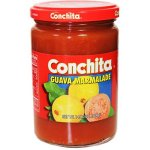
Guava Jam is a bit more runny but it can be used.
Guava Jam


Condensed Milk Buttercream it’s super easy.
Click here for recipe and Tutorial


Cream Cheese Buttercream goes great with this filling.
Click here to check this recipe and tutorial.


Moist White Cake Recipe

Moist White Cake Recipe pairs well with fruit fillings.
Click here to check this recipe tutorial.


For those who can eat eggs, this is a delicious cake!
Click here to check this recipe tutorial.


Learn to Ice a cake and also check many other
tutorials for basic cake techniques.
Click here.


Piped Shell Borders Tutorial.

Learn to pipe shells with this tutorial.

Advertisement

Cookies & Cream Cake Recipe

I love chocolate! And honestly, who doesn’t love to eat Oreo cookies? So whoever thought of putting them on cake deserves an award. In my last Blog I posted my favorite Chocolate Cake recipe so I decided to follow that with this delicious cake recipe.

I remember many years ago when I moved to Florida, I went to my local supermarket and they had a cookies & cream cake. At that time I was not into cake making but definitely into cake eating, so I had to try that cake. I must say that I thought it was delicious. The buttercream they used in that cake was like Bettercreme, (check my tutorial on this). They crushed the cookies into the Bettercreme and filled all the layers with this mixture, and then they covered the outside of the cake in the same icing/filling.

With time my cake taste has developed. As much as I liked that cake back then, I knew it could get even better. The recipe I used for the filling in this cake is super tasty. Instead of Bettercream, I used cream cheese and butter and it just takes the flavor to another level. I love the recipe how it is but if you want something lighter, you can always add a cup ofKRAFT COOL WHIP TOPPING 8 OZ PACK OF 3 to the recipe. Another option is to add a tub of Cool Whip or make your own stabilized whipped cream and add it to the recipe. Keep in mind that once you add the dairy into the mix you will need to keep the cake in the fridge. As many of you already know, I don’t like cold cake. I feel it loses flavor.

You can finish this cake with your favorite buttercream recipe. If you want something light, you can use Bettercream or Stabilized whipped cream. If you want delicious with a smooth finish, I suggest using my Cream Cheese Buttercream. This is a bakery style cake and is not about a perfect finish but it’s all about a delicious cake.

To finish this cake, I added Oreo cookies all around the bottom of the cake. This is a personal choice. But surely, who complains about eating more cookies..lol I do prefer using the thin Oreos when I am making the cake but you can use the regular ones just as well.

I topped the cake with some old fashion Ganache. I love Ganache and I know that it has dairy but it will keep well out of the fridge for a few days. Plus it makes it really creamy and delicious. If you can’t have dairy, you try making it with water instead. My other suggestion is using coconut milk.

For decorating the cake you can use anything. I decided to go all out and use Pocky Sticks flavored in cookies and cream, a bar of Hershey’s Cookies ‘n’ Cream and (are you ready for it?), more Oreos.


Click here to watch tutorial.

Here are the the links for the products and tutorials I used.

Chocolate Cake Recipe
Cookies & Cream Filling Recipe
Ganache for Drip Cakes
Bettercream Icing Tutorial
Stabilized Whipped Cream Tutorial
Pocky Stycks
Bettercream (product)
Hershey’s Cookies ‘n’ Cream Bar


Until next Blog, ta ta!
Edna 🙂

Moist Chocolate Cake- Easy Recipe

Last Blog I was talking about the difference between “Natural” and “Dutch Processed” cocoa. If you missed that post, I would suggest you read it because it can make a difference in the outcome of your chocolate cakes. In this Blog I will be talking about one of my favorite chocolate cake recipes.

When I first opened my website I had a Stout Chocolate recipe posted in there. I love that cake recipe. It’s a strong cake and almost tastes like a brownie. But not everyone wants to add beer to their cake and I can understand that. The alcohol in the recipe is baked away so there’s really no alcohol left in the cake but some people just don’t care to deal with it. Knowing this I have been meaning to post other chocolate recipes I love but between moving the website a couple of times and all the work I had, I just didn’t have enough time to sit and do a tutorial as I wanted. I can say that I finally took the time to do the tutorial and post it in the website. YAY!

This is a very old recipe but it has a few changes from the original recipe that in my opinion makes it taste even better. It makes a very moist cake and it’s super easy. The batter is a bit liquid and I am sure most people are not used to batters like that, but it works great. I use unflavored coconut oil for the recipe to make it healthier but you can use canola oil or vegetable oil instead if you prefer.

The recipe has never failed me but you can always decrease the baking soda by half a teaspoon if your cake sinks slightly in the center. Also keep in mind that depending on the cocoa you use the finished product could be different . I talked about this in my previous Blog.

I tried the recipe using Hershey’s Natural and Hershey’s Super Dark and I will say that I didn’t love the one with the Hershey’s Natural, but the one I made with Hershey’s Special Dark was really good. So if you are not in the mood to order high end cocoa for your cake, feel free to test it with the Hershey’s Special Dark. If you use your regular cocoa and it doesn’t turn out moist or with a a good crumb, make sure to try again but change your choice of cocoa this time. I assure you the cake is worth the try. I have used this recipe for many years with success.

Chocolate Buttercream Recipw

You can pair this chocolate cake recipe with my Chocolate Buttercream if you want a “death by chocolate” type of cake. I don’t use Hershey’s Special Dark for the buttercream because then it makes the chocolate flavor super strong so I tend to use a lighter flavor. I love Valhrona but you can use Ghirardelli or even Hershey’s Natural if you want to go with a super basic cocoa that you can find in any supermarket. I also love Droste but it’s harder to find. If you want higher end cocoa powders for your cakes, you might have to go to specialty stores or check in the internet for them. I will add that once you taste higher end cocoa powder it’s a bit difficult to go back to the supermarket because some of them are so good! lol

I will be working next on a tutorial for cookies and cream cake. So if you are an Oreo lover then you will love the next cake recipe post. But for now, click here for the link to the Chocolate Cake Recipe and Click here for the Chocolate Buttercream Recipe.

I hope you enjoy this Blog, until next one.. Ta ta!

Edna


Goop-Cake Release Recipe

What is Goop? Goop is a cake release mix used for pans so that the cake doesn’t stick to it. I am not sure who created this Goop Recipe but I know is old. I remember years ago working at a custom cake place. The baker had this concoction in a cake pan. She would apply it to the pan and never added flour on top like I used to do when I started baking. That was the way I was taught. You first apply a layer of butter or vegetable shortening and then add a thin layer of flour.

I never liked adding the flour because when the cake was done, I had always some of the powder on the cake and I didn’t like how it tasted. Probably I was adding more than I needed back then but we all learn as we go. I decided eventually to ask what they applied to the pan. That’s the first time I heard about Goop.

Goop has only 3 ingredients and it’s super easy to make. I get lazy sometimes and use spray on my pans but when I am making a lot of cakes, Goop is the only way to go. I always have the ingredients accessible and I can make as much or as little as I need too.

Goop will stay good in a sealed container for around 2 months. I live in a hot and humid area but I always have air conditioner on so if your house is hot, make sure to keep it in a colder area. Oil does get  rancid so keep an eye on that. If you smell something funky just throw it and make a fresh batch. If you prefer, you can save it in the fridge. You can use a pastry brush if you have one but if you don’t, use a piece of kitchen paper to spread it around the pan and it should work just fine.

Click here to watch the tutorial for Goop and to get the recipe.

I hope you enjoy this recipe.

Until next Blog.. Ta ta!

Edna

Bas Relief Tutorial

Bas Relief Cake Tutorial

Seems like everyone is getting sick with the flu and there was nowhere to hide from it. But now that I am better I have to catch up with work. Last week I posted in You tube my latest Tutorial on Bas Relief.
Bas relief is an old technique that is being used a lot these days. Everything old is new again. You can do this technique all over the cake or you can do areas of it. It really depends on what you are trying to achieve. No matter what, it’s a busy look and I can call it even messy when it’s used all over the cake. You can use any mold to do this technique and you can mix them or just be repetitive with the same one.

In the tutorial I am using flowers. If you use smaller molds it can be more time consuming so I used this mold from Karen Davies collection that has big flowers that can cover a lot of area fast. A whole cake can be covered with this technique. But sometimes just one tier is enough to make a cake stand out. If you plan to cover a whole cake with this technique, make sure to add this to the cost of the cake as it will be time consuming.

In the video I used a Mold from Karen Davies. Click on the photo to see if it’s available in Amazon. If they don’t have it,
you can check her website but if you live in USA keep in mind it will be an International order. But if you can’t find the mold, there are many options you can use to make this style of cake.

The photo to the left shows another beautiful mold that has different flowers that you can use to make this type of garden cake. I will be clear that I am not getting paid to sell these molds. I am just showing you a product that I used and liked. You can also use molds you already have at hand to make this type of cake.


I did a 2 tier cake where I show step by step how to decorate the cake and how to make the beautiful bow. I put the tutorial for rent and for sale so you guys can choose what you prefer. I want to do more tutorials but longer tutorials like that are very time consuming and the small amount I am charging will cover the cost of making the longer tutorials. I will still do my You tube tutorials but the advanced tutorials will be including all the steps on how to make a cake. I thought that paying for a tutorial as you want to see it is more convenient than paying a monthly fee and easier on anybody’s pocket. Plus you can choose which tutorials you want to buy.


I added more photos of this cake in the website. Click here to check them out.

If you want to see the Free You tube Bas Relief Tutorial Click here or on the photo below.
To check the step by step tutorial on how to make the 2 tier Cake Click here or on the photo below.
I hope you enjoy these tutorials. Until next one, Ta ta!
Edna 😀


Mason Jar Cake Tutorial

I love Mason Jars. They are reusable, great for canning, jams and storing food. I found this website that sells caps for mason jars that I totally fell in love wMason Jars Recapith. They are called Mason Jar ReCap.

My 2 favorite ones are the one with the flip top and the one to pour liquids from, but they have so many other ones to choose from.

I made a tutorial on how to use Mason Jars for cakes. It’s a fun way to make cakes to take along or share with friends and family. And I will say that there is not one person that doesn’t smile when you share  a mason jar filled with delicious cake. Even if you have a cake shop, it’s a great way to sell cakes. They stay moist longer because they are sealed. Win win!

For this tutorial I used my Banana Cake Recipe. People are always trying to find ways to pair cakes with fillings and I am sharing one of my favorite ones.

I used sugar covered roasted pecans and caramel as part of the filling for this cake. I will be sharing the recipe for the roasted pecans soon. Basically I layered the banana cake, then added a layer of caramel then added the roasted pecans on top and finishing it with another layer of cake and buttercream.

You can use any buttercream you like for mason jars. Even soft icing will do great since the jar holds everything together. For banana cake you can use cream cheese frosting. I have a Crusting Cream Cheese Recipe but I have another recipe that is softer and has more cream cheese in it. I use it mostly as a filling but it’s great to use in jars as buttercream, (click here for the recipe) . I have made this cake using Suspiro recipe too and it’s delicious. You can also use Wilton whipped buttercream that is sold in a box if you want a fast fix on a lazy day. There are so many options, you can choose what you enjoy the most!

I have a great recipe for Salted Caramel. But if you feel lazy, you can use caramel from the store. Just keep in mind that the caramel that is sold in supermarkets tends to be too soft for cake fillings. It works great for jars because the jar holds the cake in place but in a regular cake, it might be too soft and make the layers slippery.

I sent an email to the company and got a 25% discount for you guys if you are interested on getting some of the Mason Jar Recap lids. The coupon is good until May 20, 2017. You can visit their website at: www.masonjars.com


Here is the tutorial posted below. It will be also posted in my website under this link: http://www.designmeacake.com/mason-jar-tutorial


Hope you enjoy this Blog and tutorial. Until next time..ta ta!

Edna 🙂

The Crumb Coat- Cake Basics 101

The Crumb Coat

We all want beautiful perfect cakes and even though icing a cake might appear
to be a simple task, it isn’t. Achieving the perfect icing requires practice and once you learn how to do it, it will become easy and fast.

There are many ways to ice a cake. I have tested many of them and most of them work but each person will find one to be their favorite. My favorite way to ice a
cake is by doing a crumb coat. I will eventually talk about other ways of icing a
cake so you guys can choose the one you like best, but I will start with the way
I do it.

DSC_0991

A crumb coat is a very thin coat of
icing that is used to seal the crumbs
on the cake. It’s called a crumb coat because you will see the crumbs in
this layer of icing. I use crusting buttercream with my cakes but this technique works with other icings too. One thing to keep in mind is the consistency of the buttercream.
It can’t be too thin because it won’t make it easier for the second coat
to be applied but it can’t be too stiff because it will break the cake. It
needs to be in a good medium consistency.

I do have a system I follow when I ice my cakes. I bake my cakes a few days earlier. I seal them well and place them in the fridge. This will not only help
the flavors to settle down, but you will have a nice cold cake to work with. Many people make the mistake of working on cakes that are too fresh and not
completely cooled down from the baking. Some people can manage working with
a cake in that condition and do an awesome job. But most people will have
a hard time working like that. A fresh baked cake is softer, there will be more
crumbs and the cake will break easily

Raspberry filling

Now that I have a cold cake, I can torte and fill the cake and get it ready for the
crumb coat. The video I am posting
shows how I do this step. Make sure
your cake is cold. Not only does it make
it easier but it will control the crumbs
and it will help you move faster. If you
are working with stacked cakes, it will be faster to do all the crumb coats and place the cakes in the refrigerator so they cool down and the buttercream hardens. This will make the second coat easier to apply without lifting a lot of the crumb coat.

If you plan to leave the cake with the crumb coat overnight in the fridge, make
sure to cover the cake with some plastic wrap to avoid condensation. if you
get too much condensation on your cake from leaving it overnight, you want to
pat the water away with paper so the second coat doesn’t slide over the first
coat. But keep in mind that it’s better to avoid the condensation than to deal with it. Make sure your refrigerator is not too cold either as it can make condensation worst. There are other ways to avoid condensation but I will do another blog about that.

 Bench scrapper

I talk in the video about the spatula I use when
I ice my cakes. I love my 7 inch angle spatula but keep in mind you might prefer a different one. The bigger the spatula, the more buttercream you can add but it will be heavier
to handle. My other favorite tool would be the scrapper. You want a Scraper that is food
safe and has a nice L-shape that helps control how straight your cake will be. And finally it’s a good idea to have a good turntable. All these things do help to move faster and when you are earning money from making cakes, time is money.

I am posting below the link to the Crumb Coat Tutorial and below it I am adding
the link for How to Ice a Cake.

Even though the tutorial How to Ice a Cake is very old, I still use the same technique to ice my cakes.


I hope you enjoy, until next blog… ta ta!

Edna 🙂


My Favorite Chocolate Buttercream

Chocolate Buttercream Recipe

Presione aqui para Español

Chocolate is my addiction! I just love it! I have a great recipe in my website for a Crusting Chocolate buttercream. That recipe is great for cakes that are going to be stacked and for those who need a strong buttercream due to hot weather or humidity. The high ratio in this recipe helps stabilize the buttercream.

The recipe I am posting here (click here for recipe) is a recipe that I use all the time for my personal cakes. It’s made with butter and no high ratio. It’s delicious and very easy to make. Usually I like  recipes that crust so I can smooth it almost to look like fondant. This recipe doesn’t crust the same as the recipe listed above, but it crusts enough to be lightly smooth out with Viva Paper.
If you haven’t used this technique you can click here to watchDark Chocolate Cake with Chocolate Buttercream
 tutorial about it.

I made a step by step Tutorial on this
recipe that is in a video on my website.
One benefit from this recipe is that you
can pipe beautiful borders with this recipe.
The cake itself can stay outside the
fridge for a few hours as long as you
leave it in a room with air conditioner.
If you live in a state that is colder than
Florida, you can probably use it on your stacked cakes. But make sure you do
a test before you use it on a cake for
a client. Just make sure to use
butter and not margarine when doing
the recipe.
chocolate

I love to use this buttercream with my dark chocolate cake recipe. If you love chocolate, this is death by chocolate. I will work on the tutorial for the cake and post it soon. In the meantime, I hope you enjoy the recipe just as much as I do. Look below for the link to the recipe and tutorial.

Click here or on the photo to go to the tutorial and the recipe.

Chocolate Buttercream Recipw


Until next blog, ta ta!

Edna 🙂


Cake Decorating 101- The Shell

Piped Shell Borders Tutorial. Para el Blog en Español, Presione Aquí.

I love piping and through the years I have learned that piping gets better the more you practice. Of course, learning tips and tricks will be helpful, but let’s face it; piping is basically a form of writing. We went to school and spent many hours and years learning how to write. Why would people think it can be learned in one session?

I am not going to say that it’s not possible to learn it in one day. But it’s like school, some people will have an easier time learning and others will need more practice. But with some determination, anybody can learn to do it.

Piped shells are one of the most basic ways to finish a cake. I made a video tutorial that teaches step by step how to pipe shells. For those who are beginning to pipe, I went into more detail, making sure to explain what to do and not to do when piping them.

Just like those of you who are starting, I was a beginner once too. I know all the things I did wrong back then. These days I can explain well how things go wrong and how to avoid it. Knowing the tricks might help getting better at it faster, but practice is the only way to improve.

Click here for t the step by step video tutorial.

I hope you enjoy the Tutorial,
Until Next Blog, ta ta!

Edna

Christmas Cake for 2015.

Christmas Cake Design 2014 by Edna De la Cruz from Design Me a Cake

Every year I do a Christmas cake. It’s a tradition I keep and enjoy. I used to make decorated cookies. But for the past few years I decided to make a cake instead of the cookies. I miss doing the cookies but time will just not allow me to do both.

I decided to do a blog to answer the questions that people ask me when I post a
cake. All the green letters are links to the products.

Here is the naked cake. 

Christmas Cake work in progress


I wanted a Christmas style cake so I definitively wanted green in it.
The fondant I used for the green came from Renshaw. Most of you might
not have heard of them. They are a British company that over 100 years
experience in baking and cake decorating.

renshaw2

I was completely pleased with
this fondant. Often times dark
colors in other brands of fondant
tend to crack, but Renshaw did not crack, the flavor was good and
it was easy to work with.


Renshaw Green Fondant

For the bottom 2 tiers, I used my homemade white fondant. I will post that as soon as I can do a video tutorial on how to make it.

I used Luck’s Classic Gold Shimmer with my Airbru Classic Gold Shimmer airbrush color from Luckssh to color the cake. I love to airbrush a cake but one thing you need to know is that airbrushing will make any small crack look more like a crater. Especially if you try to airbrushed too fast and make the fondant too wet.When it
is too wet it will begin to dissolve the fondant.

I suggest you give it a coat of color and let it dry in between coats to get a better finish. In between drying sessions I keep working with other details of the cake. This way I move faster.

Gumpaste Swag Mold with tassles

For the bottom tier, I did a band in green. and I cut the top part of the band in the same swag shape I was using on top of it.
Ruffle Swag MoldThis is the mold I used called,
“The Ruffle Swag”. It’s from the company Marvelous Molds. The mold has two layers of ruffles and is topped with a string of pearls.

I decided to paint those pearls with a
Gold Highlighter. (click here for gold). This gold is meant only for decorations that can be taken
down before cutting the cake.

There are lots of highlighter golds out there but none of them are edible. I have seen some companies say it’s approved, but the reality is that none of them are approved. There are other golden tones that are non-toxic but they don’t have the true gold color that the highlighter gives. If you need a true gold for a full cake,
then you can either use edible gold leaf or buy 24 carat luster gold.
This option is a bit more pricey, so I stick with airbrushing.

GrandTasselDrop


In between the ruffles I added this mold. This one is called, “Grand Tassel Drop Mold”. This one I finished with the highlighter Gold as well.

At the top of each tassel, I added a simple Blossom like the ones I made in my tutorial, “How to make Simple Blossoms”.


Watch the video above to learn how to make Simple Blossoms.
Click here for the Plunger Cutters.
Click here for the Flower Former.

Ruffle Border with Bows.

On the tier above I used the “Ruffle Border”. RuffleBorder

This mold has the same ruffle detail as the swag but it’s on a straight line. The molds connect easily so you can connect them and make them look
like a one big piece. I painted the ruffle part on both the swag and this
one with Super Pearl Luster Dust.

Bow MoldOnce again, on this ruffle border I painted the pearls
with the Gold Highlighter and then
I added Molded bows

Some people may wonder why I used a mold when I can do bows so easily without the mold. Well, the reason is simple. It’s just a different look and it can be a fast approach too. But basically for me it’s just part of the look I wanted
for the cake.

Christmas 2014 2

For the tier that I airbrushed, I added cutouts that look like ornaments.
I don’t have this available at the web store at the moment but if you are
interested in them, feel free to leave me a comment below so I can order some.
They are really easy to work with and I hand painted them with Gold Highlighter. 

Perfect Pearl Mold

For this tier, I used the Perfect Pearl Mold
to finish the base. I wanted to bring some of
the white, green and gold to it. This way I
have a color flow between all the tiers.
In the first and last tier, I used an Extruder
to finish the border. I kept those borders
green because I wanted them to blend
with the background.

Gumpaste Poinsettia

For the topper I used a Poinsettia. I teach how to make these flowers in my DVD, How to Make Gumpaste Poinsettia”. In the DVD I explain how to make fantasy Poinsettia like this one. I added some gumpaste snowflakes, finished with some disco dust and a cutout Christmas tree dusted in Gold Highlighter.
The Christmas tree cutter is made by Ximena (click here for cutter).

On another note, I added a Newsletter button at the top of the blog for those
who want to receive an e-mail newsletter. I don’t like my email to be filled with
daily newsletters and I don’t plan to do that to you guys either. But I can send
news for a new tutorial posted, or a special sale at the store or even a contest.
Plus I plan to do more advanced tutorials too.

I would love for you to share any ideas you may have with me. Do you
guys like basic details on how a cake was done, or do you want
full step by step tutorials? I ask this because I can do basic tutorials
but the ones that are step by step are more time consuming and I
might have to charge a small fee for those. Do you prefer PDF
files or video tutorials?

Any ideas that you have will be great for you to share with me.I want
to do either A video or blog, where I answer questions you have.
So any ideas you have, comments and questions, feel free to
post here or go to my Page in Facebook and post them there.

You are my cake family and I have always tried to help in areas that you
need help. Hopefully with the new year I can finally finish the new website
and not have to stress about it anymore. I want to dedicate more time to
what I truly love, making cakes and teaching. Hope you guys help me with
all this work I have! lol

And don’t worry about misplacing recipes. The new website will have all the
recipes I have and I will add more to the list. Maybe some of the links
will change but all will be there. Even cakes I never posted from my earlier
years.
I will leave my old cakes so you can see how much I have
grown through 
the years. I want people to know that to achieve better
cakes you need time 
and practice. Giving up is not an option.

Hope you had a wonderful New Year and wish you the best ahead.
Lots of hugs from my house to yours. Thanks for being my cake family!

Until next blog, ta ta!
Edna 🙂