
Where I come from we like our cakes extremely moist. I don’t know how many of you have traveled to the Caribbean and tried the well-known “Rum Cake”
from Tortuga.This cake is extremely moist, delicious and comes in many flavors
too.
That is just an example of the kind of cakes we like in Puerto Rico; extremely
moist. Some people even use Brandy instead of rum. Personally, I prefer
rum better, but adding the alcohol is always an option. Cakes that are made
with just flavored Simple Syrup can be equally delicious.
Many of you have asked me: “What is simple syrup?” Well, this blog is for you. It’s just as simple as the name implies. It’s basically sugar and water cooked until the sugar is dissolved. You don’t want to overcook it since making the sugar too thick would be harder to get into the cake.
There are many recipes for simple syrup and all of them work. The most common one is in the ratio of 1 cup of water to 1 cup of sugar (225 gr) to 1 cup of water (225 gr). Some people make a stronger version by using 2 cups of sugar to 1 cup of water instead. You can always choose what would work best for you. I will write the full recipe in the website.
The video tutorial is at the end of this blog. Press here for recipe.

My recipe for simple syrup consists of 1 cup (225 gr) of sugar to
2/3 (150 gr) cup of water. I do less water in my recipe because this way
I can add flavorings to it. You can always add more water if you are not
adding anything else to the syrup.
The next question I usually get is: “How much liquor do I add to the recipe?”
I can say 1/4 cup to 1/2 cup, but the problem is this amount will vary depending on so many factors. For example, if you use Captain Morgan Rum you probably will need less rum than if you use Bacardi rum because of the extra spices it contains. I like to use Bacardi Rum because it has a very smooth flavor that doesn’t ‘pack a punch’ as you bite in the cake. Then again, some people might want the rum flavor stronger and that is where things are going to change. Each person has his own opinions when it comes to taste, so the best way is to test it and see what you prefer to use with your own cakes. If you decide to try the simple syrup with Rum, try adding first a few tablespoons of the rum and taste it. From there, you can add more rum if you want too. Another great flavor to add is Amaretto.
Amaretto is one of those liquors that I usually add by looking at the bottle. Basically, I add the liquor until the syrup starts turning into a brown tint. Rum and Amaretto are the most loved flavors in my business. Even though it’s alcohol, by the time you cut a piece of the cake you will have the flavor but you won’t get drunk from it. It’s just a small amount of alcohol, unless your cake is soaked in it and you made the syrup too strong.
Simple syrup is mostly used in sponge cake since that particular cake tends to be on the dry side. The sponge soaks the liquor really nicely. But it can also be used with other types of cakes. Just make sure to test it. For some recipes a little goes a long way. Some people will use simple syrup when a cake didn’t turn out moist, maybe due to overcooking or a bad recipe. You can use it not only to ensure a cake is moist, but to help a cake stay moist for even longer!
If you don’t want to use alcohol in your cakes, you can always add other
flavorings. If you use extract, I usually just add another 1/4 cup of water to my
recipe or just make the basic recipe a 1:1 ratio. You can use juices too or even concentrated juice to give flavor. I have used strawberry syrup from my
‘Strawberries in syrup recipe’, and also concentrated orange juice with great success.
Coconut milk is still another option you can use. Lemon juice with simple syrup
makes a lemon cake sooo delicious. Again, there are so many options!
You can even add lavender, ginger honey and many other flavors to infuse the syrup.
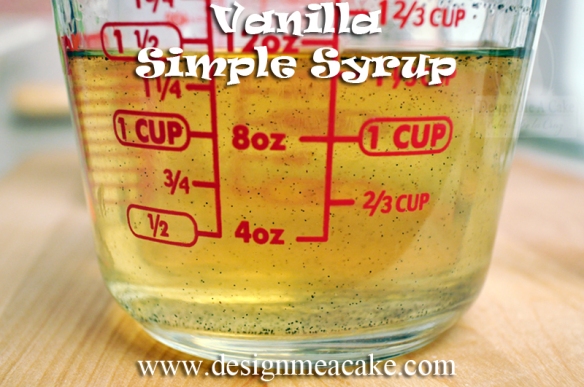
Vanilla Simple Syrup
Remember, you can keep your syrup simple with the addition of vanilla, but if you want to compliment the flavors of your cake just add extra flavors to the syrup. Simple syrup is not only used in cakes. Bartenders use it for drinks all the time. For those who will ask: “Can I save the leftovers?” Yes, you can. Some people will save it for up to 2 months in the fridge, but make sure that where you store it is completely clean or crystals can build up in it. I usually make it as I need it. It’s so easy to make.
You can make flavored syrups for coffee with leftovers too. For example, with vanilla, you can add it to coffee or tea. You can make syrup for ice cream or pancakes by adding simple syrup to jam. You can make some caramel or melt it, and add the syrup to make a soft caramel that you can pour over desserts or even coffee. This syrup has many uses. I have even used it to fix a jam that I overcooked were it becomes a bit too hard.

Tutorial Coming Soon.
Another question people tend to ask: “How much syrup do I add?” You can use a pastry brush to add the syrup to your cake. It will add smaller amounts of syrup and you don’t have to worry about adding too much. Another way to safely add smaller amounts would be to use a spray bottle. If you are trying to make a very moist cake like the Caribbean version, then I suggest a squirt bottle, like the ones Wilton sells for the candy melts. With it, you can add plenty of syrup fast.
Typically, I layer my cake and add the syrup to both sides of each layer. This way I ensure there is moisture on both sides. Once I do this, I like for the cake to rest at least overnight, so the flavors come together and the syrup spreads through the cake plus, a cold cake is stronger, so you can layer it and crumb coat easily. In simple steps:
- Bake Cake
- Seal and place in the fridge before it completely cools down
- Let cake rest overnight (it can stay in the fridge safely for 4 nights, SEALED WELL)
- Layer my cake
- Add simple syrup on both sides of each layer
- Add filling
- Give the cake a crumb coat,
- Seal the cake with Saran Wrap so it doesn’t get all wet from condensation
- Place the cake in the fridge either overnight or until it cools down enough
to give a second coat.
Don’t leave the cake in a hot environment. A cool house will do ok if the fillings
in the cake are safe to be left out the fridge. Personally, I place my cake in
the fridge so it cools down. This way I can apply the second coat to my cake
very easily.
There is another way the simple syrup can be added to a cake. You can add the
syrup before the cake has cooled down completely and this helps the syrup
spread faster. Then you place the cake in the fridge sealed well. But you have
to keep in mind that It will be more difficult to layer a cake after the syrup
is in it, and layering the cake while the cake it’s warm can be a problem
since the cake is too soft.
Most of the time that I have seen people adding the syrup to the cake this way,
don’t layer the cake. The only have one layer of filling in a 4 inch tall cake.
Some people don’t like doing it this way because they feel the cake will ferment.
I have seen it done successfully but you have to take precautions if you do it
this way, especially in the hot summer days. Always do a test cake for the
area you live in to see which option works best for you. I usually work in
an area that has AC.

Vanilla cake soaked in vanilla, almond, amaretto simple syrup.
It’s important to keep in mind that a cake that has been soaked or lightly sprayed
with simple syrup, will taste better by the next day. The reason for this is
because the syrup needs time to spread around. In the cake above you
can see patches of dry areas. That’s because the photo was taken as
soon as the simple syrup was added. After you let it rest, the syrup will
reach those areas.
Some options for chocolate cake can be dark rum, cherry syrup, Frangelico, Amaretto, Chambord, chocolate liqueur or Kahlua.
For butter cakes you can use Amaretto, Grand Marnier, Chambord, Coconut Rum, white chocolate liqueur and so much more!
Once again, you can keep the syrup simple or you can add flavors to complement your cake.
For those who prefer a Latin style cake, I will do another blog dedicated just to that cake and I will go through how much syrup per cake you can add. In the meantime here is the tutorial. Press here for the link to the recipe.
Hope you enjoy the tutorial.
Have fun with the recipe. Until next time, ta ta!
Edna 🙂
